A couple of weeks ago we discussed how our new webhook features help to bridge the gap between Sympli and the other tools your team may be using. We used Trello as an example as we set up a Zapier integration that automatically sends new Sympli annotations to a Trello board called "things to fix" (or something of the sort), making iterative design workflows much easier to manage.
In this quick tutorial, we'll recreate a similar workflow that's better suited for small teams (or even solo designers). We'll create a Zapier integration that automatically sends new Sympli annotations to Wunderlist, where the designer can then see his or her "things to fix" alongside all of their other daily tasks. Requiring a singular app that displays all of your tasks is a must for busy task-trackers.
We'll create a "List" in Wunderlist for the Sympli annotations to be sent to, and the designer can then check them off the list as he or she makes the necessary improvements to the design. It's important for teams to be able to use the tools that boost their productivity on an individual level, which is what makes webhook functionality so useful. Some of us like using Trello, whereas some of us like using Jira. For those of you that like using Wunderlist, this tutorial is for you. Let's begin.
Creating a List in Wunderlist
If you're a Wunderlist user, you probably know how to create a list already, but if you're not and curious about Wunderlist, hit the + icon in the bottom-left corner.
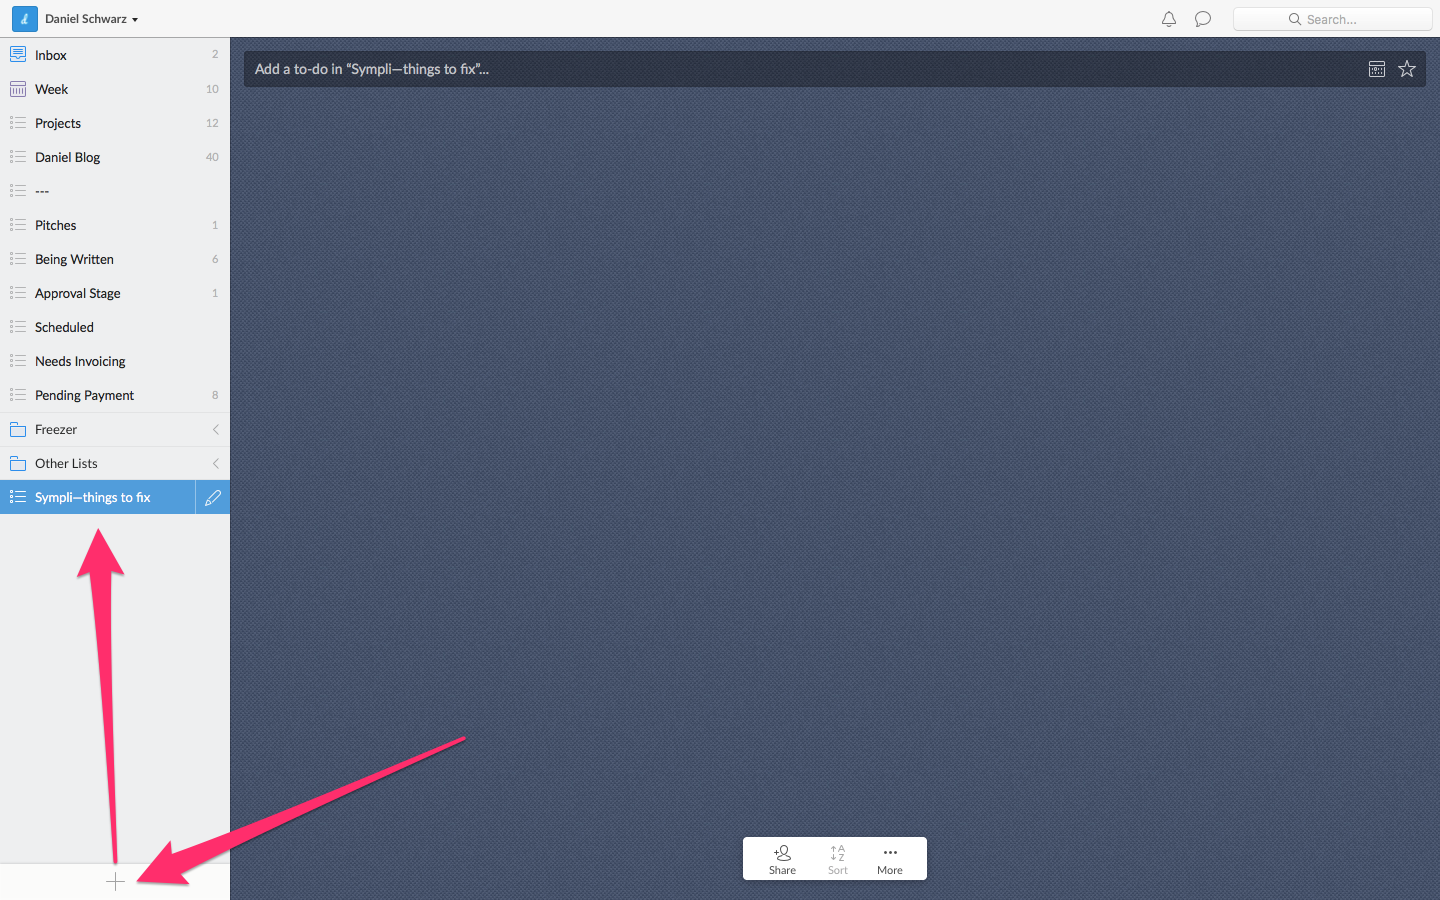
I've called the list "Sympli—things to fix", and using my own Wunderlist as an example (see below), you can see that I have many other lists, some of which are work-related, and some of which are not. It's awesome to be able to see everything in a singular dashboard when you have multiple responsibilities.
Right now, this list is empty.
Generating the Webhook in Zapier
Next, we'll use Zapier to create a webhook. We'll send Sympli annotations to this webhook, and Zapier will then forward them to Wunderlist (like a digital postman!).
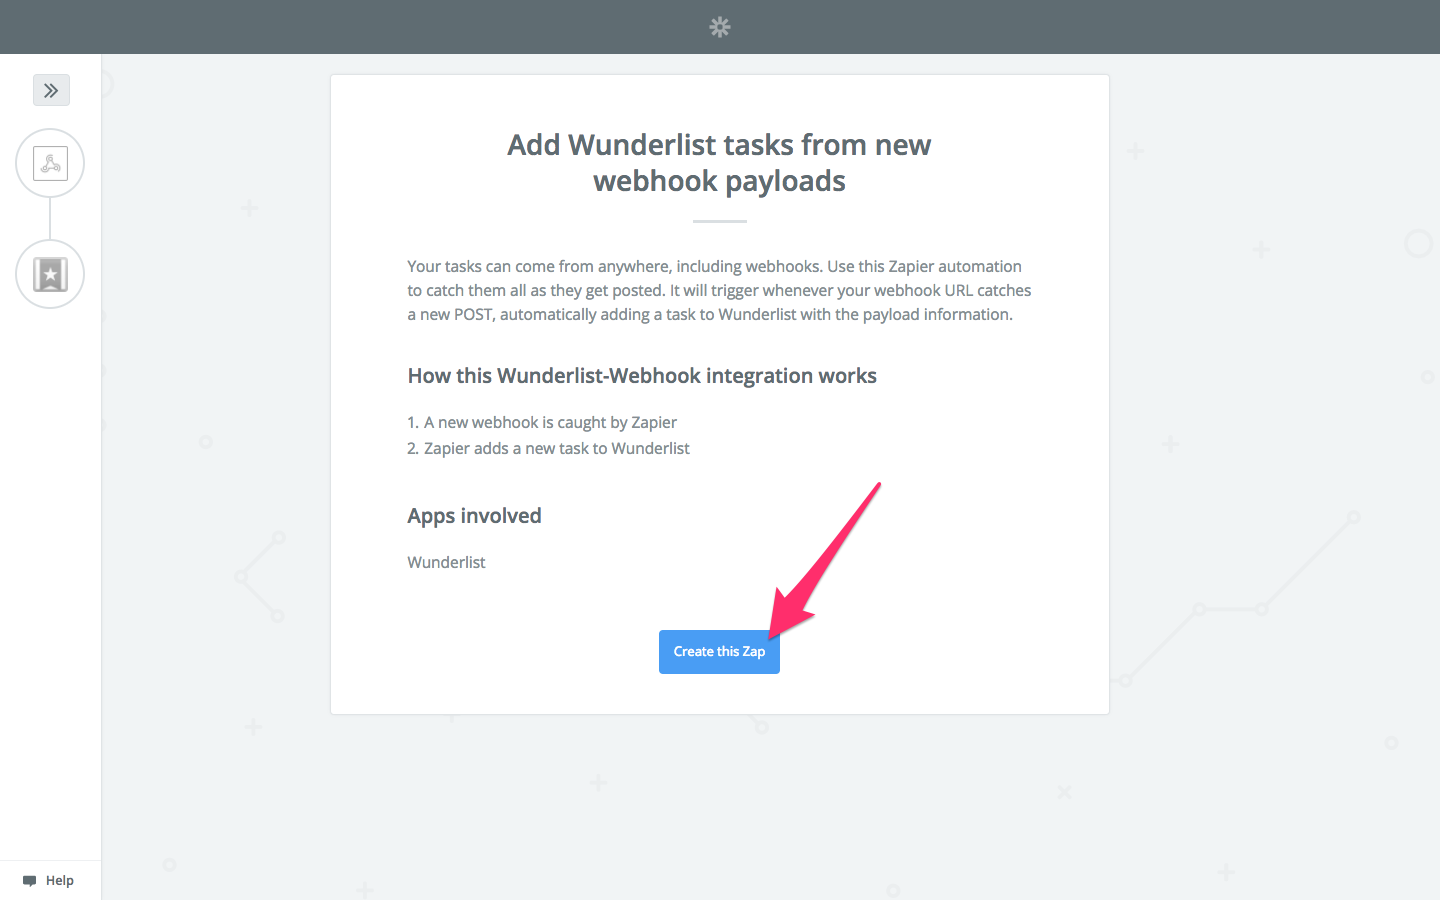
Navigate to the Webhook/Wunderlist setup screen to begin.
Click "Create this Zap" to continue.
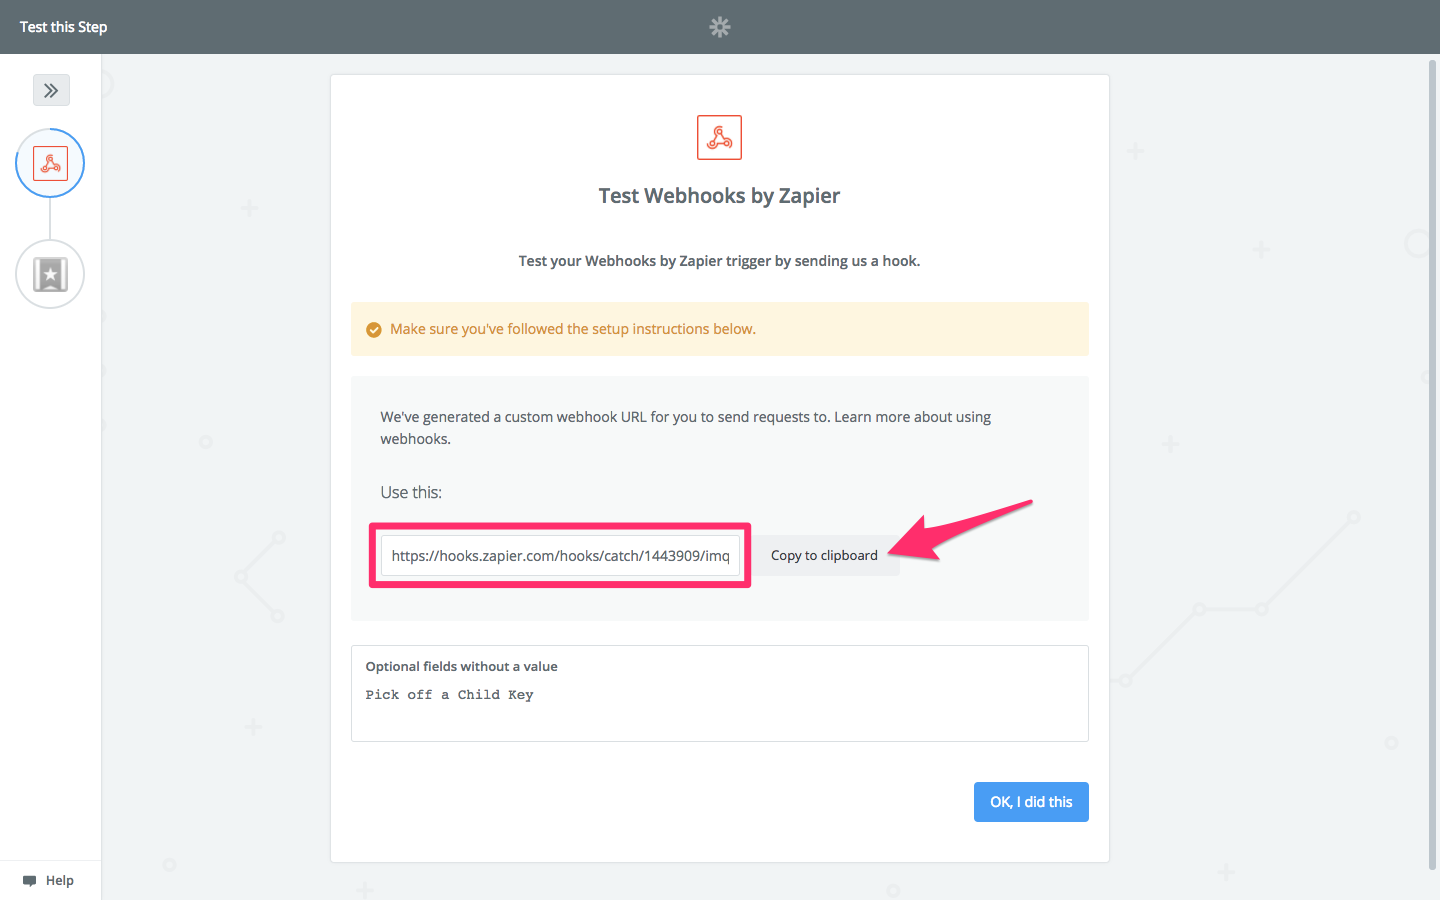
Continue with the on-screen instructions until Zapier offers you a webhook URL, then copy the URL to the clipboard. We'll need this webhook URL shortly.
Pointing Annotations to the Webhook
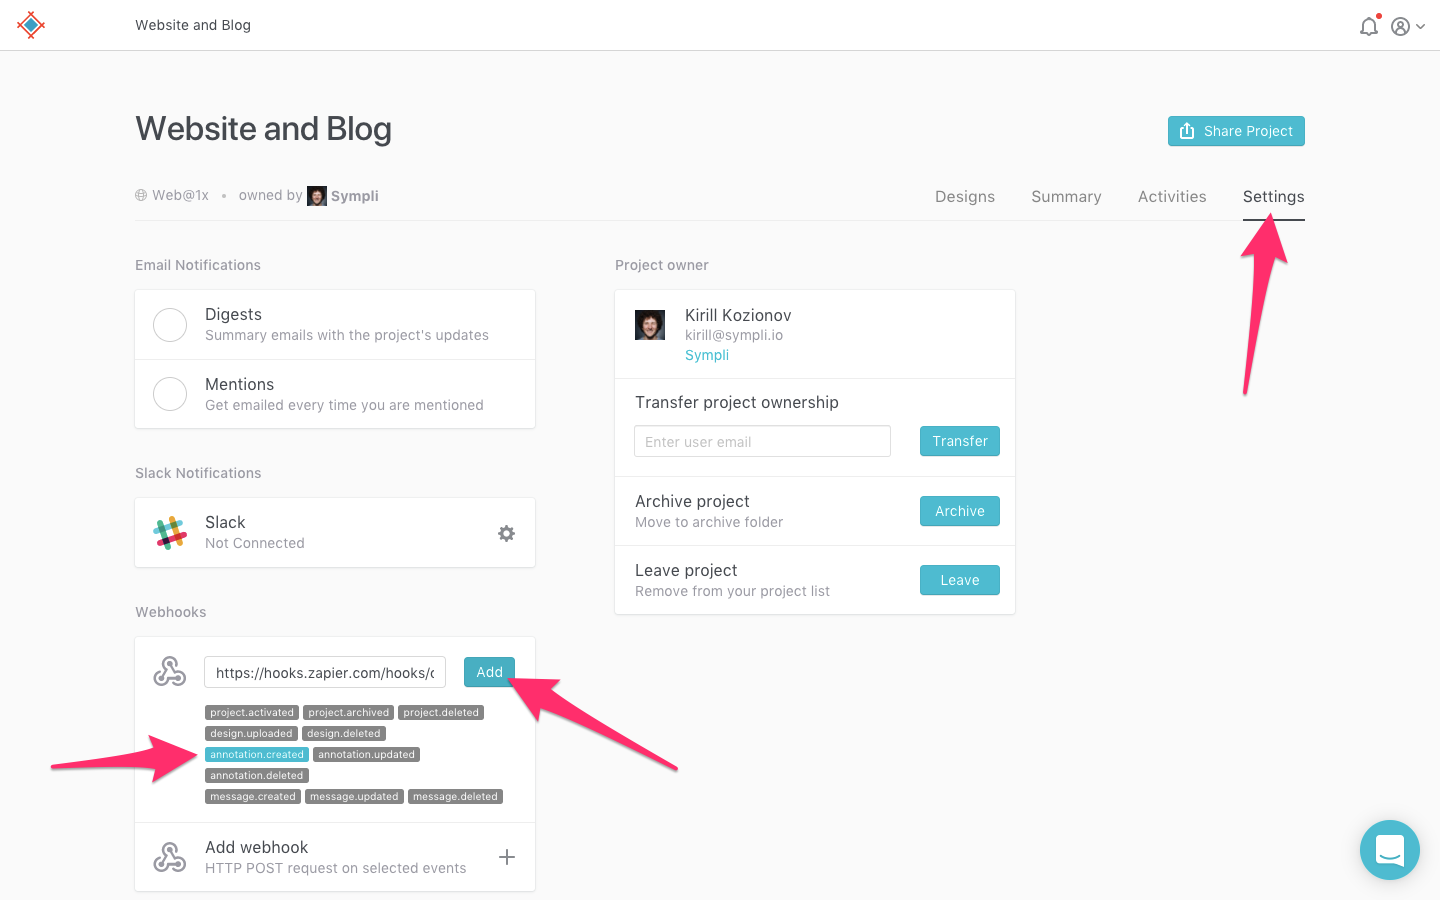
Now we're going to navigate to our Sympli Project and submit our webhook URL. We'll also define an event that triggers this webhook, which in this case will be when an annotation is made. Navigate to the "Settings" in Sympli screen, click "Add Webhook +", and then copy the webhook URL into the input field. Make sure to choose "annotation.created" as the event, then finally hit "Add".
Creating a Test-Case
Next, we need to continue with the Zapier setup to narrow down what data is sent to Wunderlist in the payload, and what Zapier does with that data. For example, does the annotation message body translate to the Wunderlist task name, or the task description? Click "OK, I did this" to continue with the setup in Zapier.
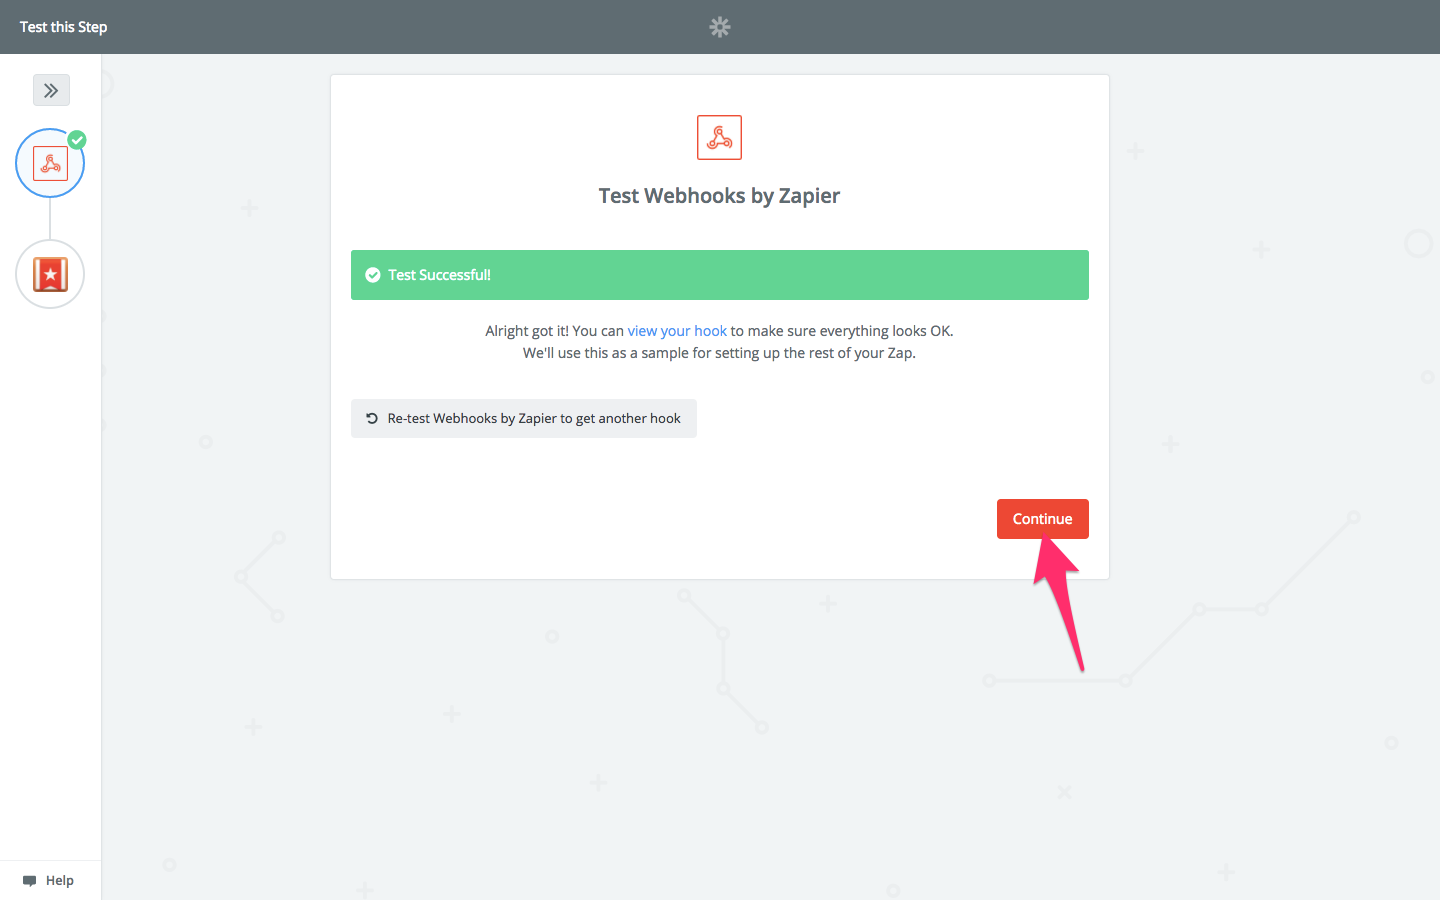
Before anything, Zapier will check that your webhook has been set up correctly. If the test was successful, click "Continue". If it wasn't successful, make sure that you activated the webhook by making a test annotation on a screen in Sympli.
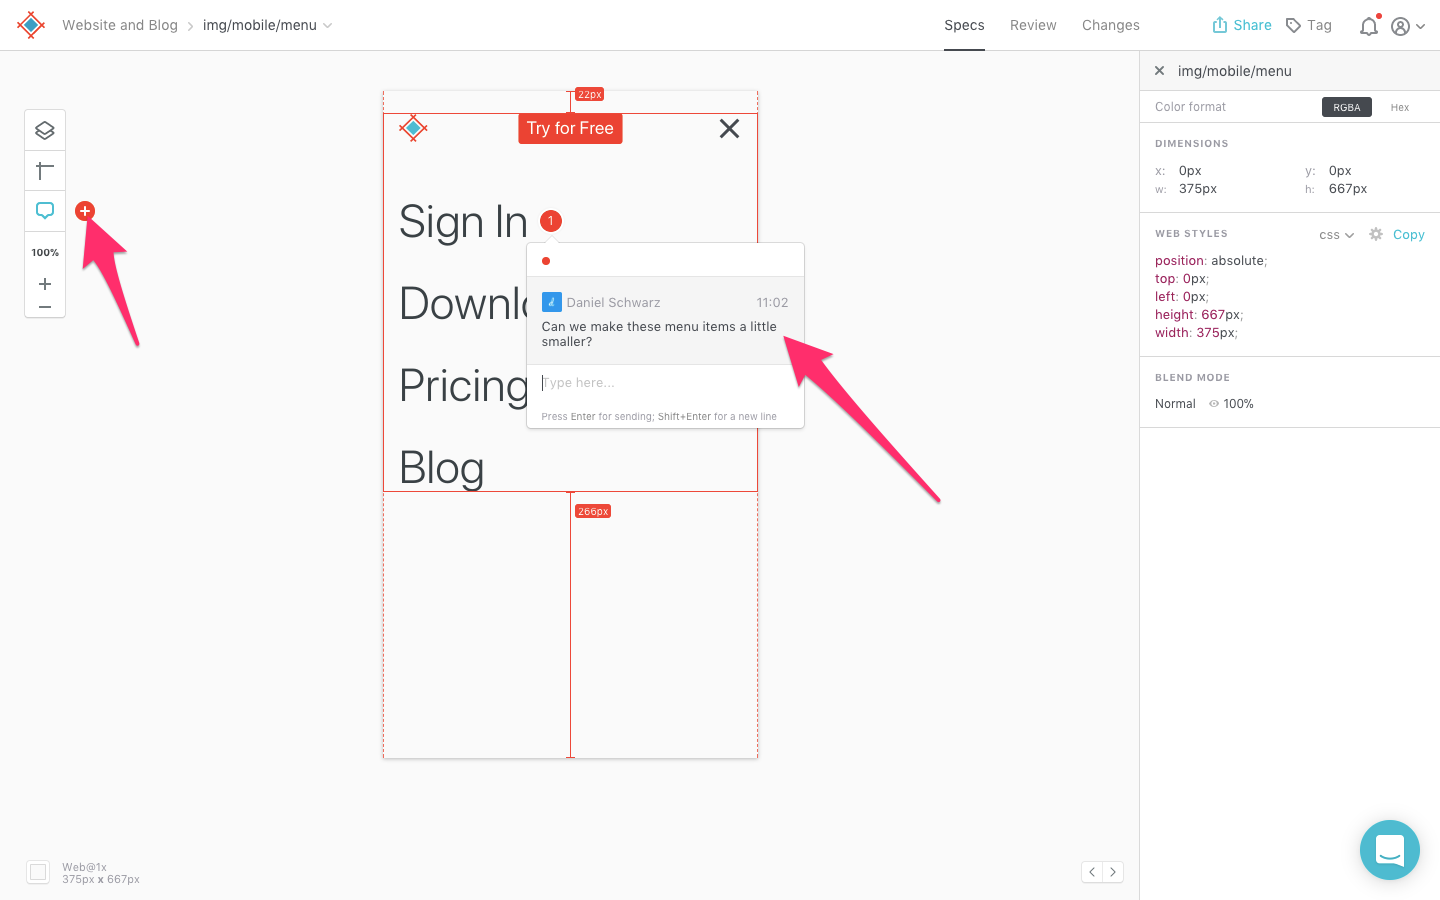
You can make a test annotation in the inspect interface.
Collecting the Annotations in Wunderlist
Next, we'll need to connect our Wunderlist account to Zapier. Follow the on-screen instructions to do that, which will redirect you to the Wunderlist website at some stage. Press "Save and Continue" once that's done.
Now we need to sync-up the webhook payload with Wunderlist tasks. Click "Show advanced options" to reveal the full list of customisable options for a Wunderlist task, which includes "Due date", "Assignee" and an optional "Note" among others.
From the dropdown field, choose your Wunderlist list.
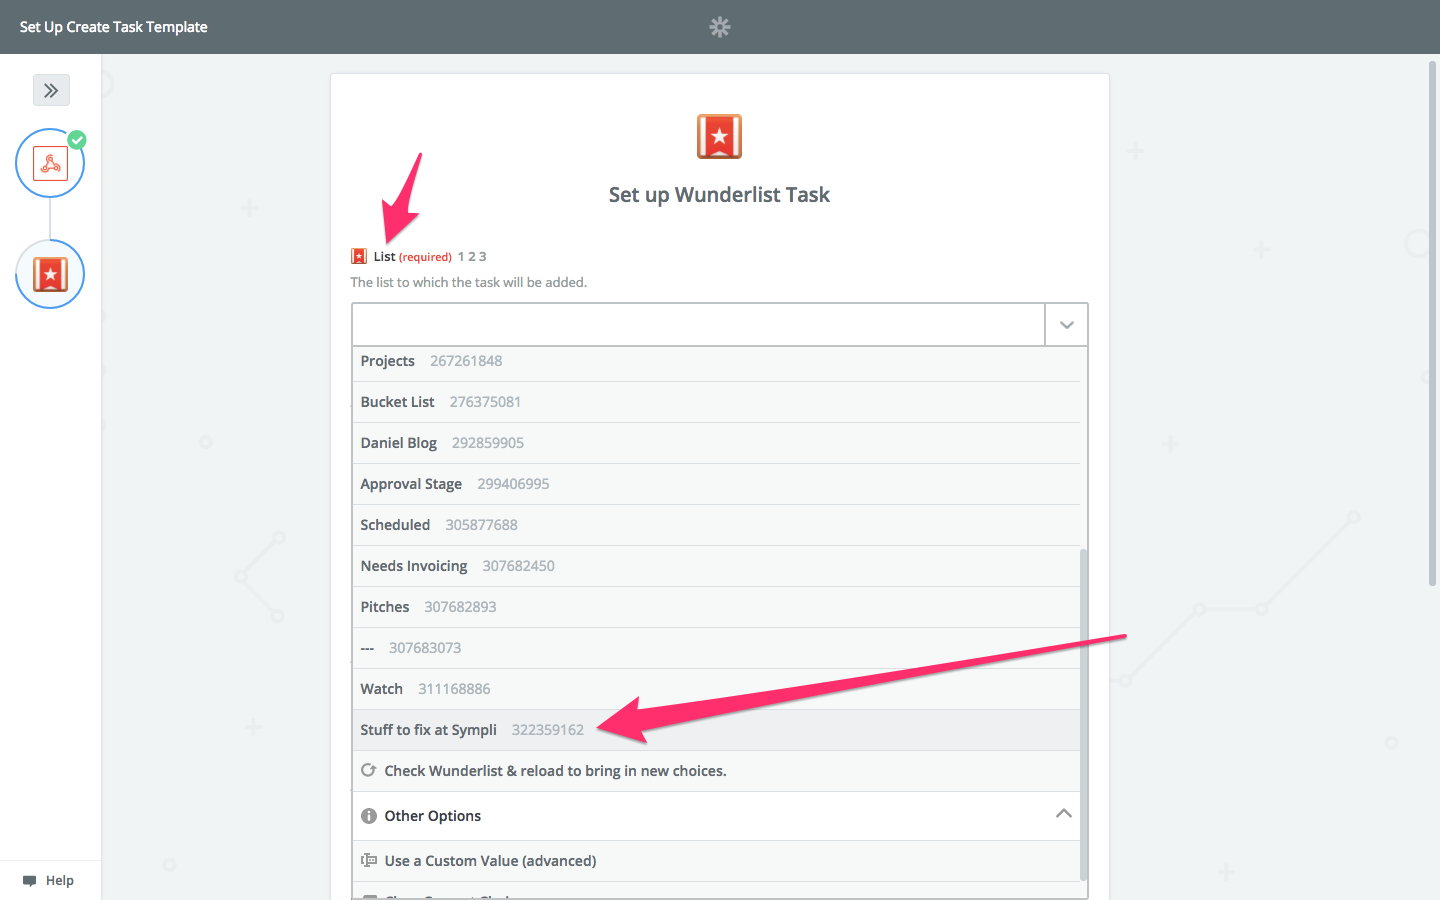
Sympli annotations will now appear in this list, but we now need to define how they'll look, and what data we'll actually send.
For the "Title" field, choose "Data Message Message" from the list of available options; this is the actual annotation message body, so we want this information to be displayed first, to make it easier to distinguish one annotation from another in the Wunderlist list of possibly dozens of Sympli annotations.
For "Starred", choose "yes". We can use this to indicate any new annotations that haven't met your attention yet. Once the annotation has been acknowledged, you can un-star it in Wunderlist, unless of course, you fixed the design straight away.
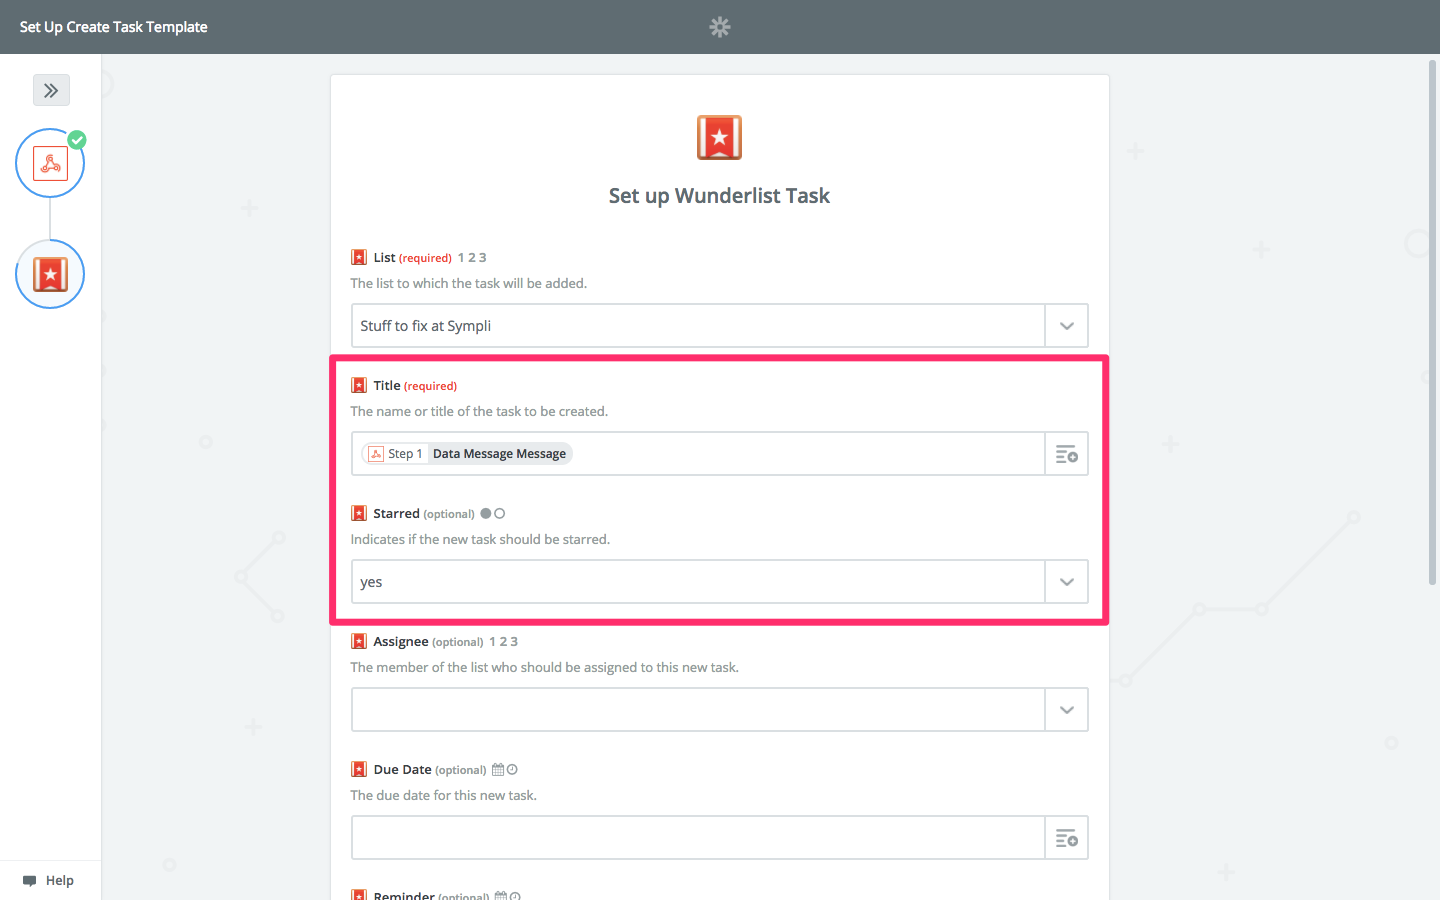
For the "Note", it's a nice idea to use "Data Design URL", which is a link to the screen in Sympli, so that it's super-easy to refer to the screen for added context.
Wrapping Up
Click "Continue" when you're done, then follow the on-screen instructions to create a test. If you check the list that we created in Wunderlist, you should notice that the annotation has been added to the list as a task, and as the description, a link to the screen where the annotation was made for convenience.
Mega easy, right?
Also, the task is "Starred" by default to indicate that it's an annotation that was made recently and requires your attention. When you've made the necessary changes to the design, simply tick the box to mark the task as complete, where Wunderlist will then play a deeply satisfying "Ding!" sound to wrap things up.
———
How are you finding webhooks? Have you setup any cool integrations?


