

Webhooks allow you to integrate apps with other apps, to make certain things happen in wonderful and intuitive ways, and we've enabled them for Sympli teams so that you can integrate Sympli with the other apps that your team uses.
"Isn't that what an API does?"
No, not exactly. An API requires a request. Consider the Login with Facebook button on Pinterest; Pinterest is essentially saying: "Please can you authorize this user, Facebook? Cheers!". Facebook then returns with: "Sure, this is [firstname lastname] and their email address is [email]", or, "No, we don't know this user".
Okay, What is a Webhook?
A webhook, on the other hand, sends data whenever it's available. Once set up, user action (the request) isn't required to make something happen. Let's take our already-existing Slack integration for example; once set up, the webhook looks for new screens in Sympli and sends them to a designated Slack channel, where the team can then discuss the screen in a live, group conversation.
Webhooks are still based on the functionality of the API of said integration, only they're triggered when a certain event happens, and the API is then called on your behalf (assuming you've already authorized yourself with the application). In the case of Sympli and Slack, the event is that a screen has been uploaded.
Accessing another app via a webhook requires a webhook URL, which is basically (I'll use Slack as an example again...) Slack's address. When setting up a webhook, you'll then select a designated Slack channel, so Slack would then respond with: "Great, you can set 'em down in the #screens channel". It's safe, and coordinated.
And that's how a webhooks work.
Let's take a look at one example you can setup right now.
Sympli Annotations → Trello
We're going to use Zapier to send Sympli annotations to a Trello board. For those that don't know, Trello is a kanban-style app for team collaboration (it's useful for tracking bugs/fixes). Zapier will be our middle-man, the delivery guy that'll send the annotations to Trello, as a Trello "card" that'll have the annotation itself, and a preview image of the screen that the annotation was made on (and a link to it).
Let's begin.
1. Generating a Webhook URL
Go to Zapier and click "Create this Zap" to begin. Zapier will map out the route with your help, so that it can make its delivery rounds when needed.
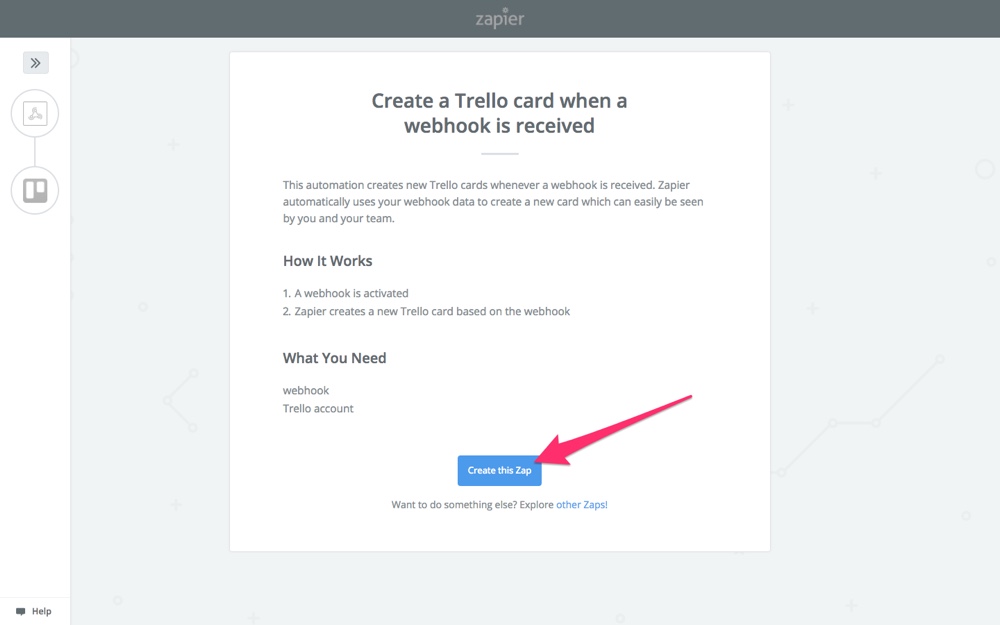
Click "Continue" if/when asked.
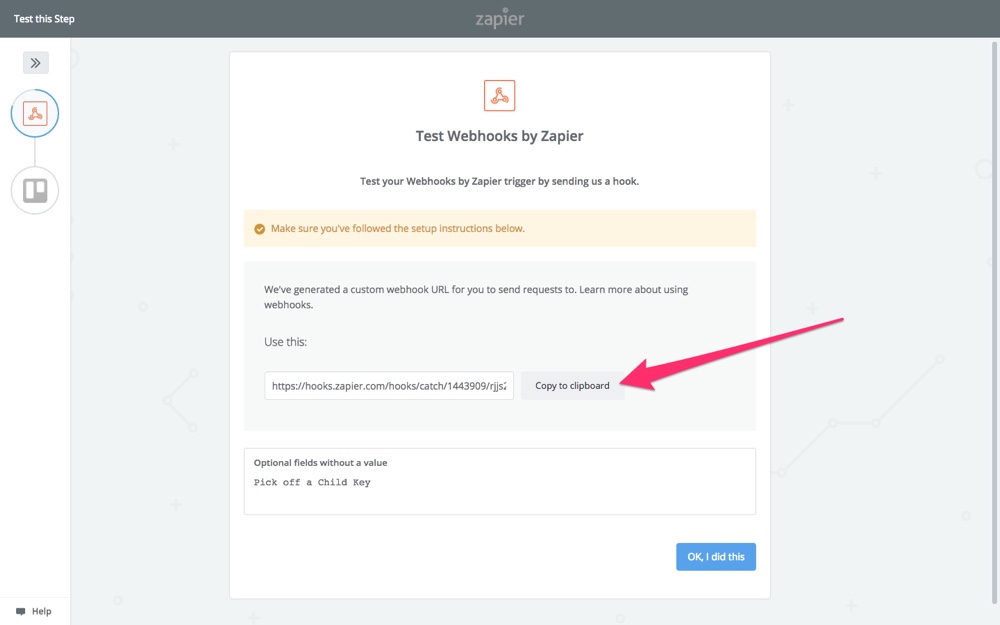
Zapier will start off by giving you a webhook URL, which you should think of as the Post Office where the annotation is held before being delivered. Copy this URL to the clipboard, because we're now going to inform Sympli about the webhook URL.
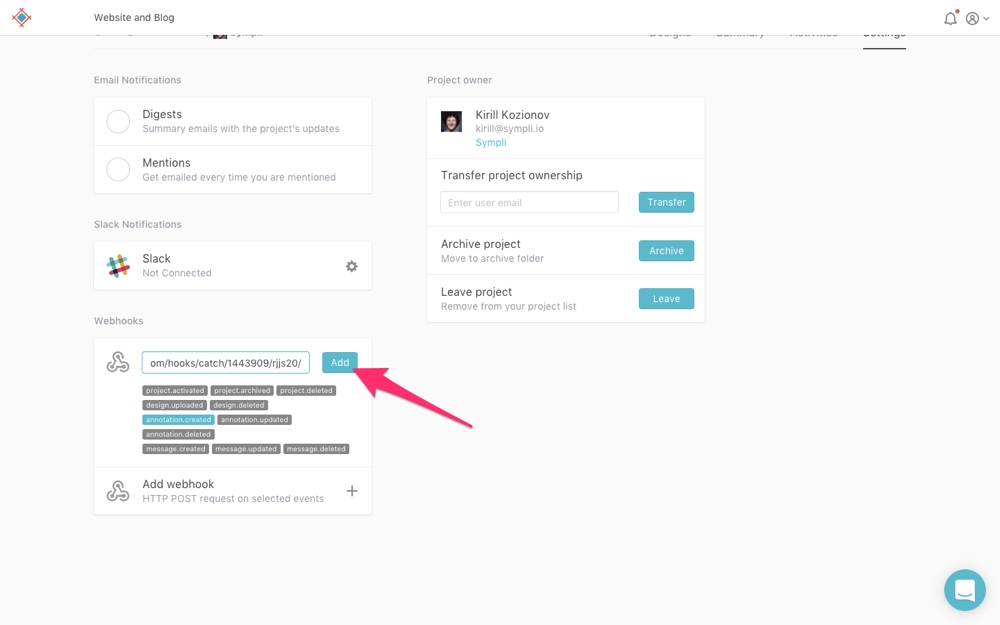
2. Connecting Sympli to the Webhook
After that, find your design in Sympli and navigate to the "Settings" screen, then click the "Add Webhook" button. Paste the webhook URL in the text field, then select "annotation.created" as the event trigger. Now, details of the annotation will be sent to Zapier via this webhook URL whenever the event is triggered (the trigger being that an annotation has been made on a screen in Sympli).
Continue with the Zapier setup, where it'll now double-check that the webhook has been established successfully. We'll need to actually trigger the event for this to happen, so follow the on-screen instructions while making an annotation on a screen in Sympli (for example: "Logo needs to be aligned to the left").

3. Locating the Delivery Address (Trello)
Once Zapier has confirmed that the webhook has been successfully established, we'll need to connect our Trello account, and then Trello board. Easy peasy, click "Connect an Account" to continue with this step.

Now we have to match the Sympli annotation data with Trello values (i.e. the Sympli preview image as the Trello card attachment, the Sympli annotation itself as the Trello card name, et cetera, et cetera). For the first option, "Board", select the Trello board where these annotations will be delivered to, and then choose the "List" they'll be sent to. A list could be called, for instance, "things to fix".
Finally, for "Name", choose "Data Message". Now, each Trello card will be named according to the annotation that was made, for example, "Logo needs to be aligned to the left". We can add further customizations, such as attaching the preview image (the screen where the annotation was made) to the Trello card.
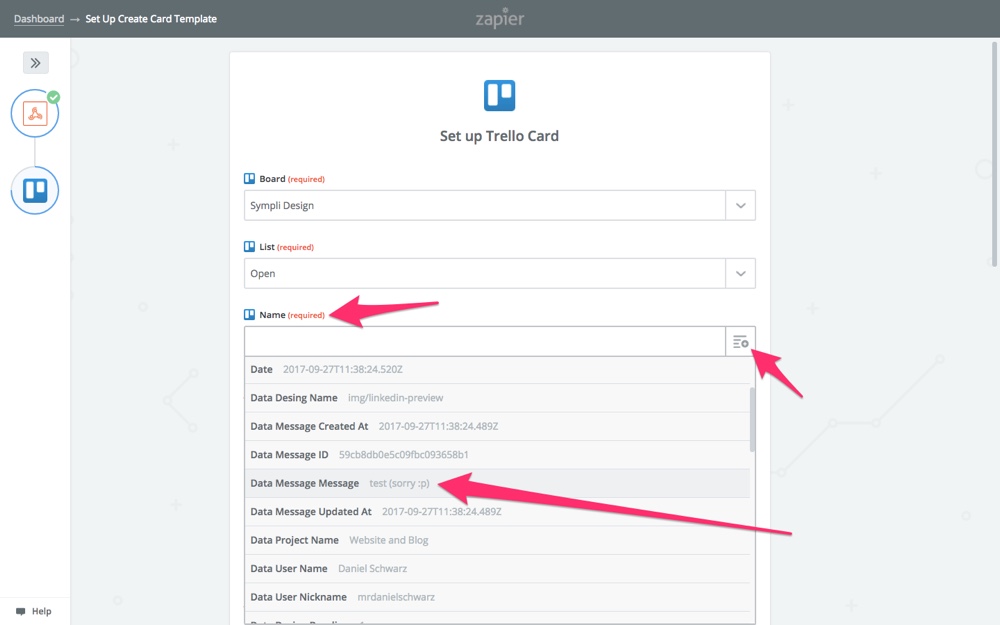
You could also add the preview URL to the Trello description.
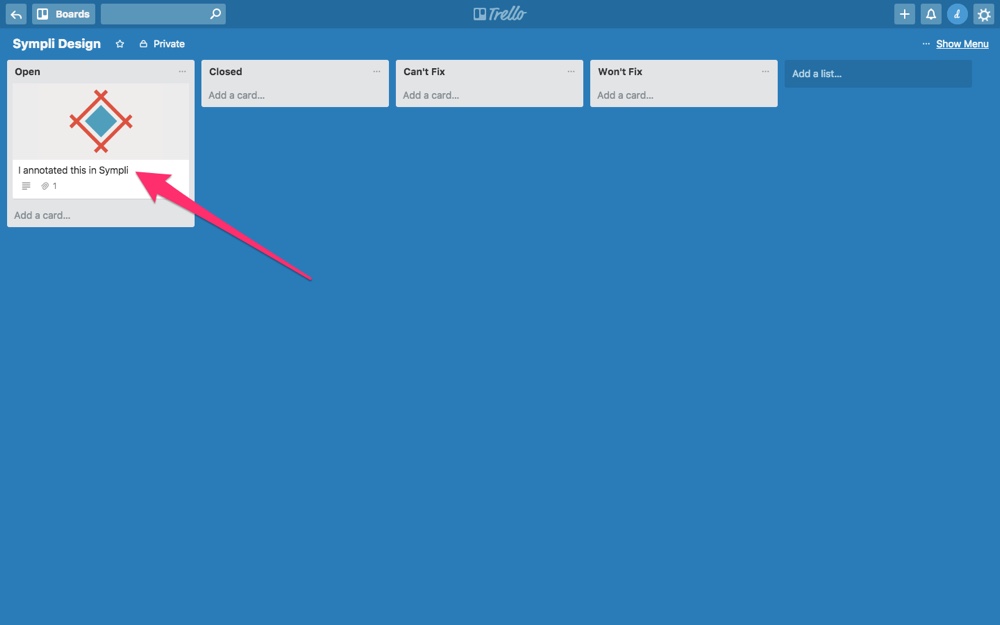
Continue with the Zapier setup to test the integration. The test annotation that we made earlier will now be sent to the Trello board to confirm that everything went smoothly. As you can see from the screenshot below, it worked flawlessly!
———
We're very curious to see what kind of webhooks you'll set up. Connect with us on Twitter to let us know, and reach out if there's a specific webhook you might need some help with. We're always happy to help, or even write up a tutorial!