
This winter we bring you one more way to automate and connect your processes. Now you can use webhooks to integrate Sympli Handoff with the tool your team rely on.
In this guide we'll be creating a task list in Notion from comments made in Sympli Handoff. We're going to use Zapier as the middleman, so keep in mind, that we're going to need Zapier Pro subscription since we'll be creating a custom integration from scratch. You will also need a Sympli Handoff subscription and an admin badge in your Notion space.
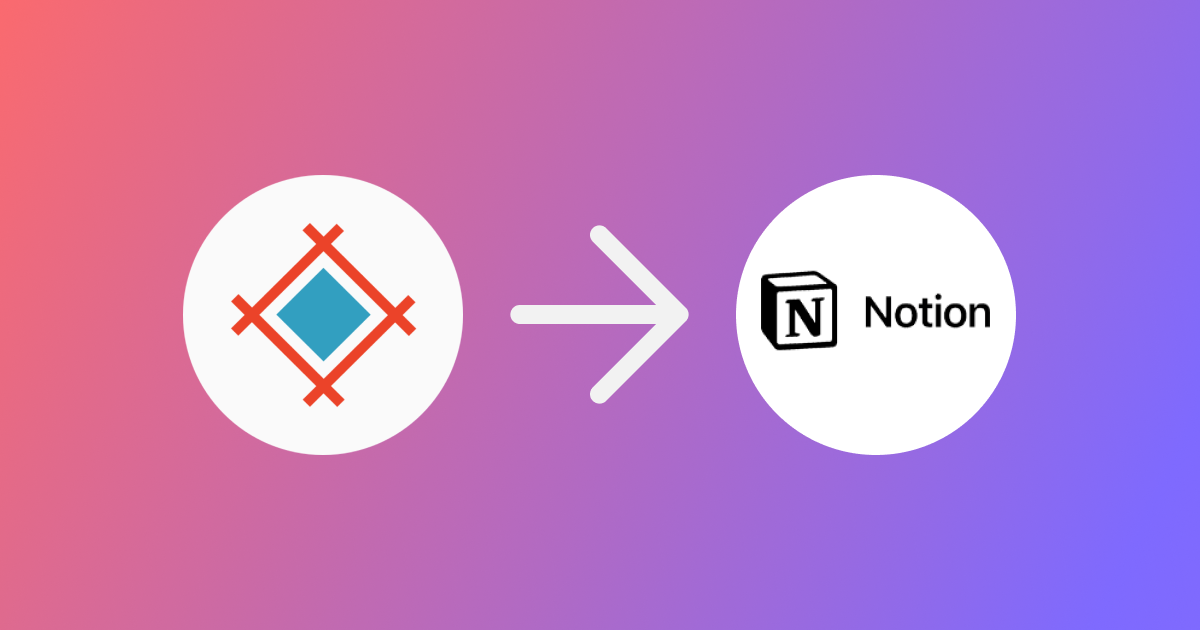
Sympli annotations → Notion
Set up webhook
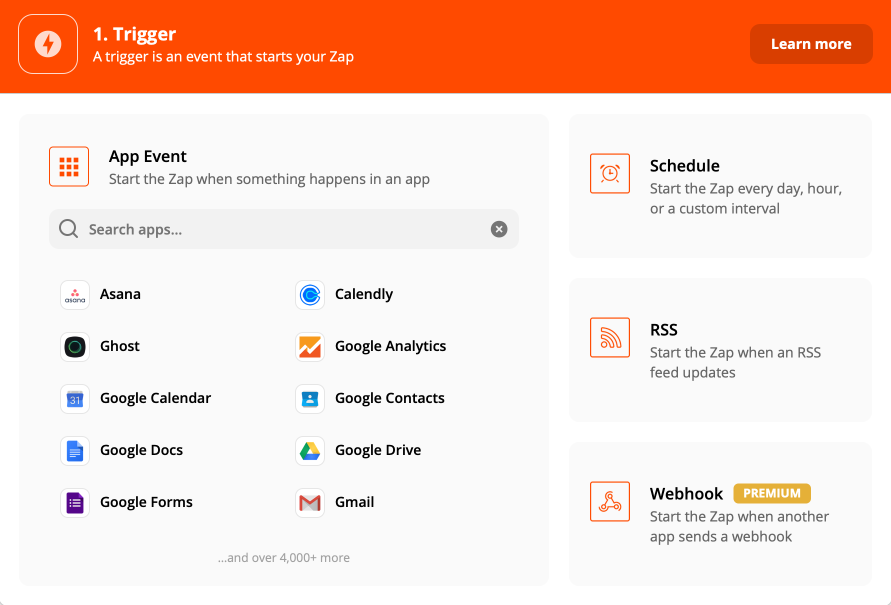
Go to Zapier and click "Create Zap" to begin. This will open a new window where you'll need to choose an option to create a custom Zap, choose Webhook.
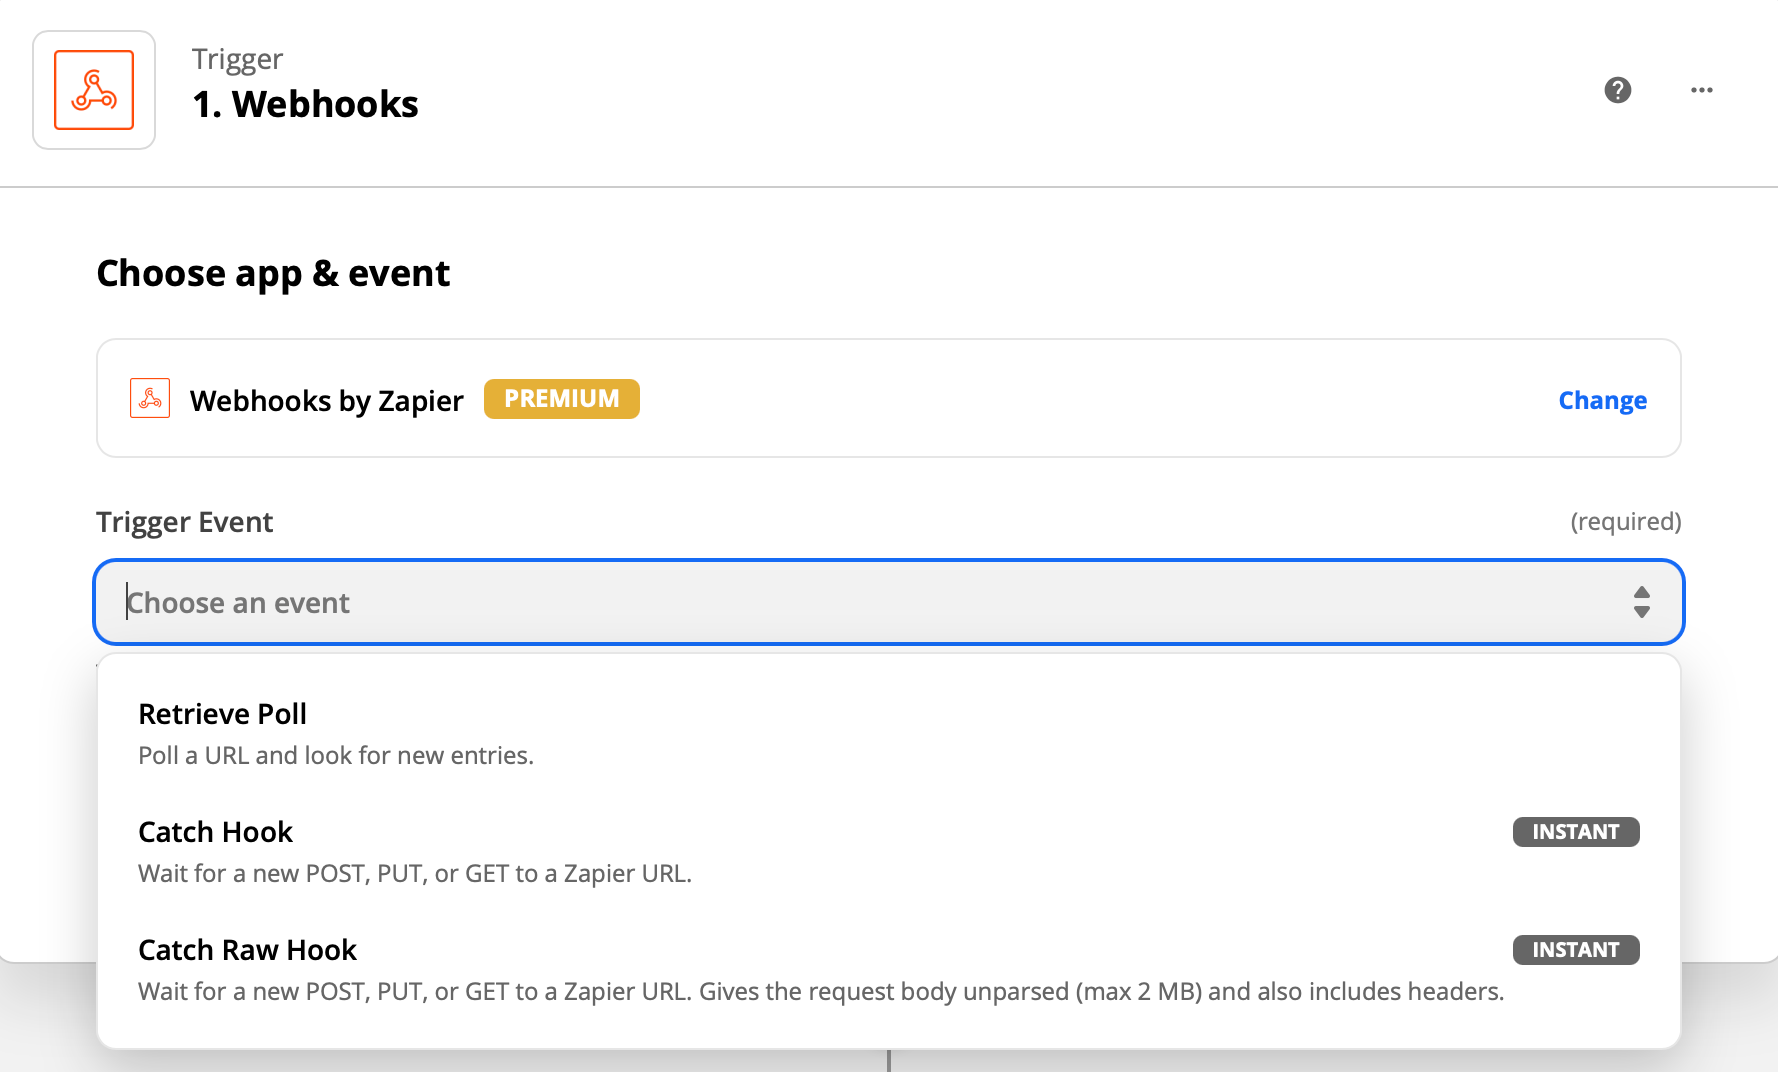
This will launch the integration setup process. In the first step, click on the dropdown for the Trigger Event and choose Catch Hook. Press Continue.
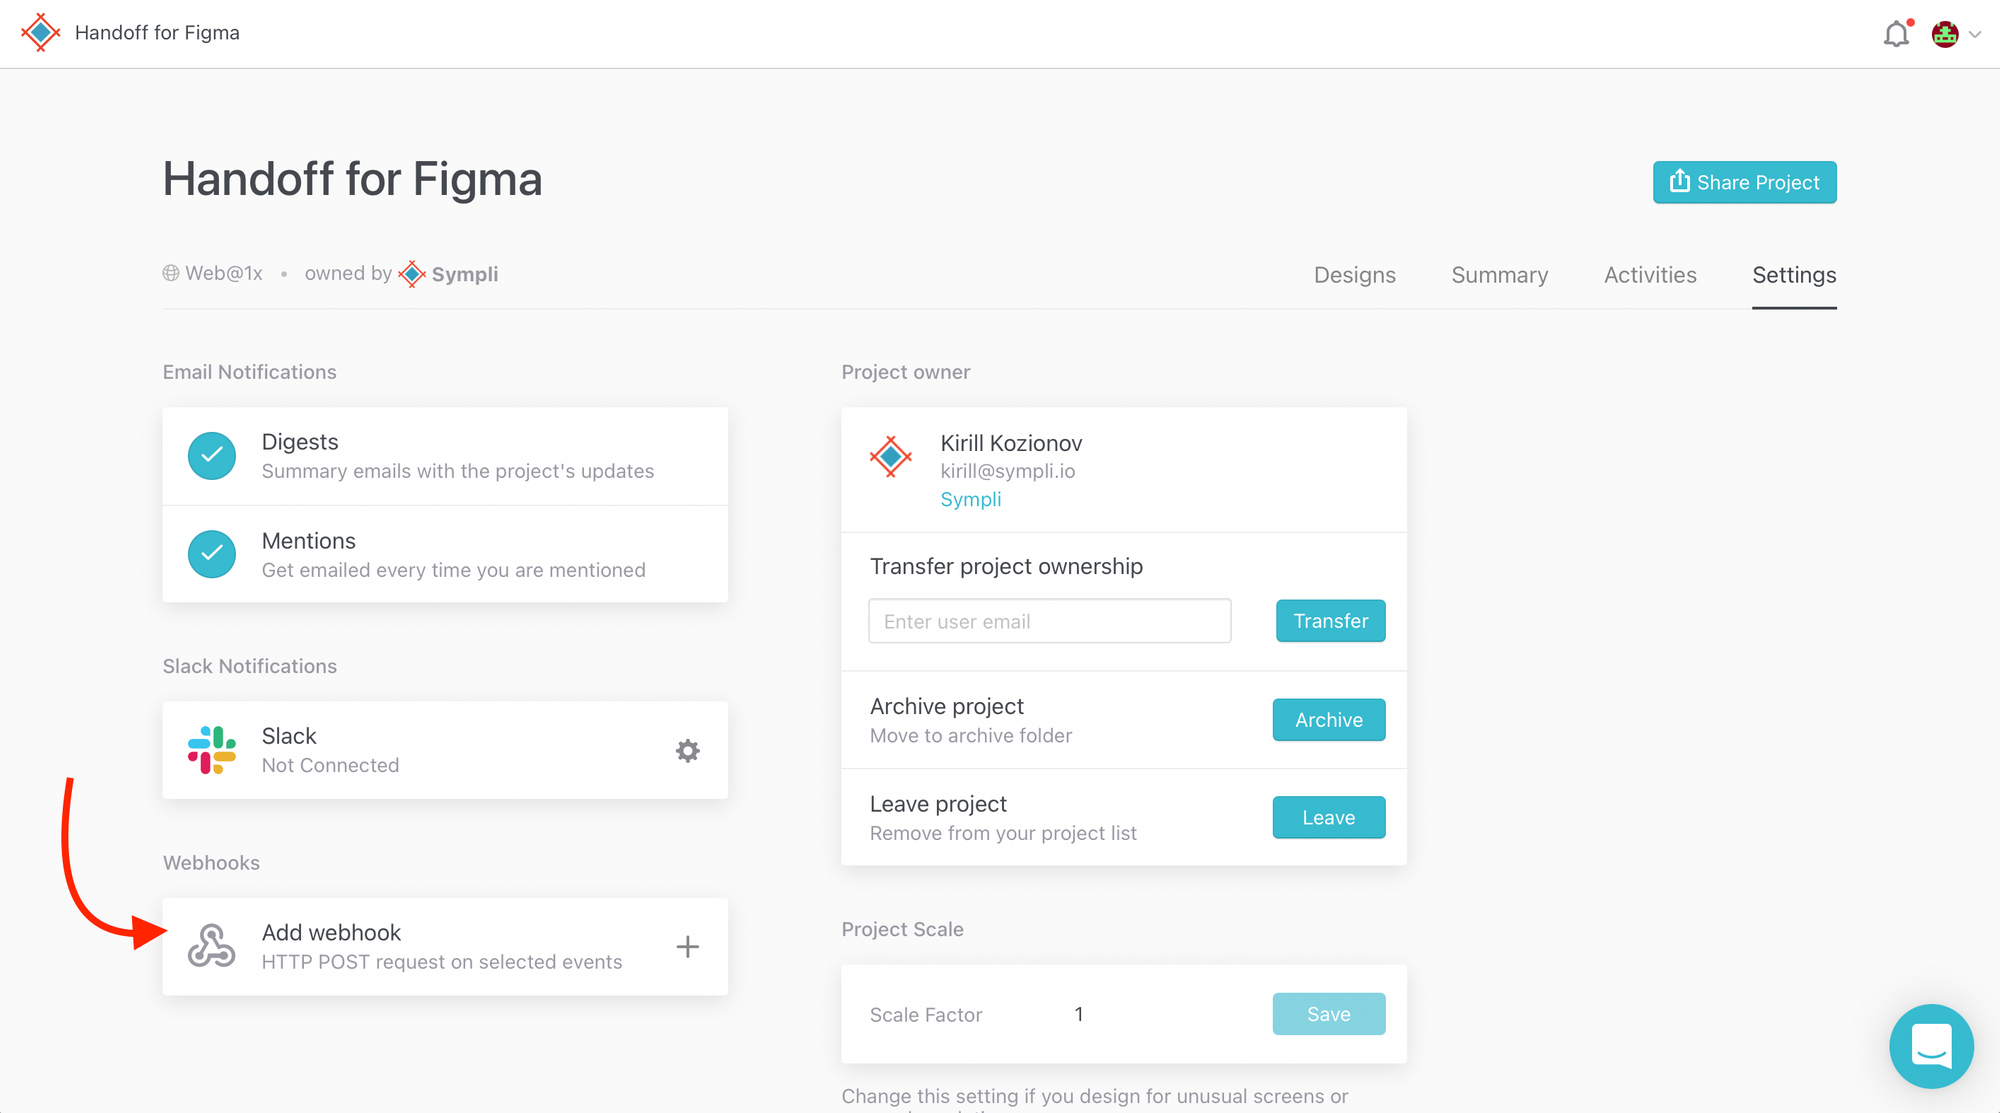
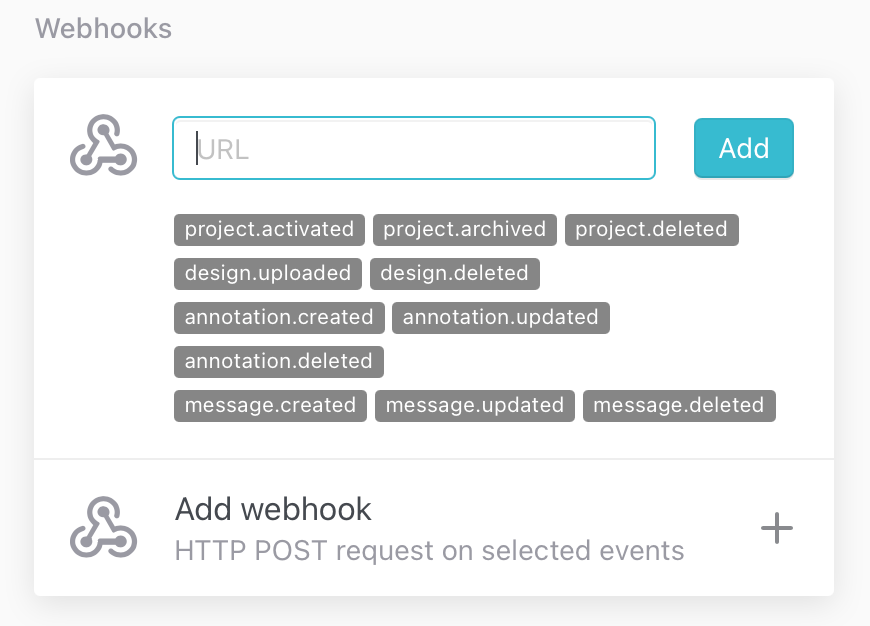
Next, you need to copy the custom webhook URL provided by Zapier and enter it into the webhook setup box in Sympli Handoff. Go to the project you want to get the notifications from, then to project Settings. Click on the webhook setup box.
The box will open, and you'll see the field where you need to paste your custom webhook URL provided by Zapier. Click on the parameters that you want to get from Sympli. For this purpose, we need annotation.created and message.created. Select them and click Add.
Next, return to Zapier and click Continue. After this, you'll need to test your trigger. Go to your Sympli project, choose any design and create an annotation, then go back to Zapier and click Test Trigger. If everything is fine, Zapier will tell you that it found the request and you can continue.
Configure Notion
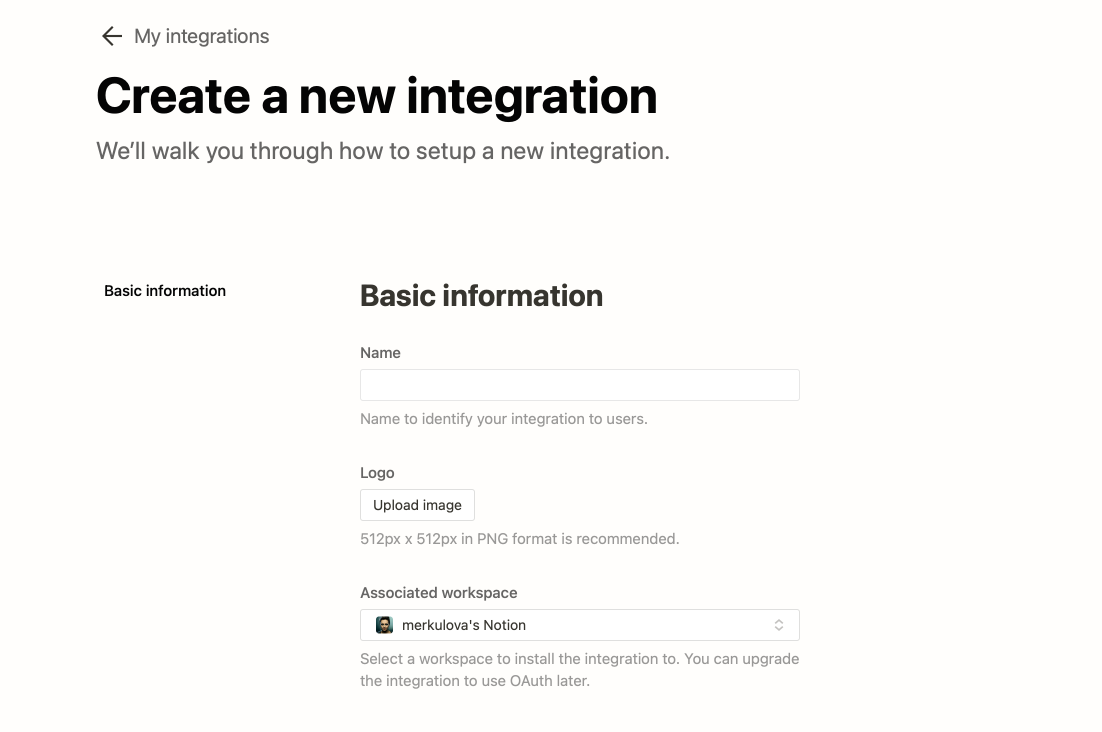
Go to your Notion account Settings and Members, choose Integrations and click on the "Develop your own integration." In the new window that just opened click "New integration" and create one. Then click Submit.
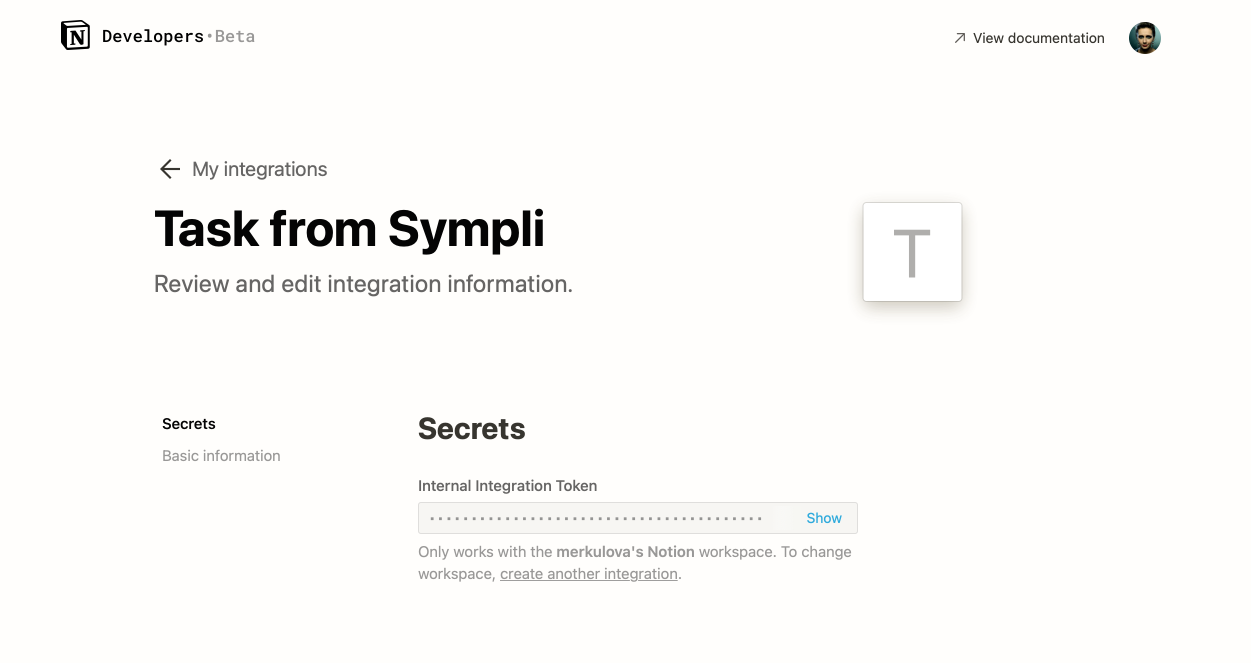
On the next screen, you will see the token filed - copy the Internal Integration Token. Click on Show and it will become visible and avaliable for copying.
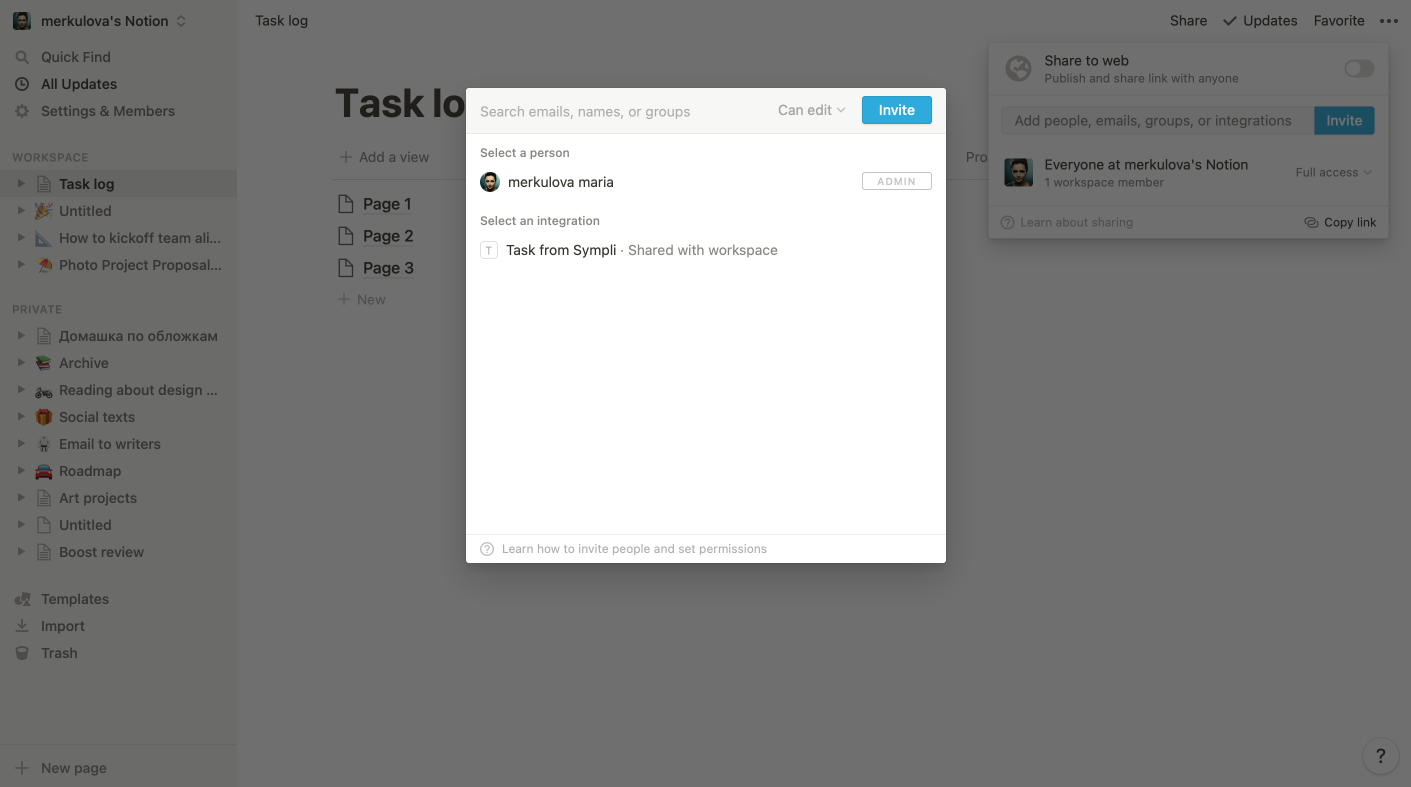
Next, return to Notion and create a new page with a Database (Task list or Board, for example). Share this page with your integration. Open the Share dialog click on the field and choose your integration (See the example below). Click on the Invite button.
Ok, now we're ready to go back to Zapier.
Setup an action in Zapier
Go back to your configuration process in Zapier.
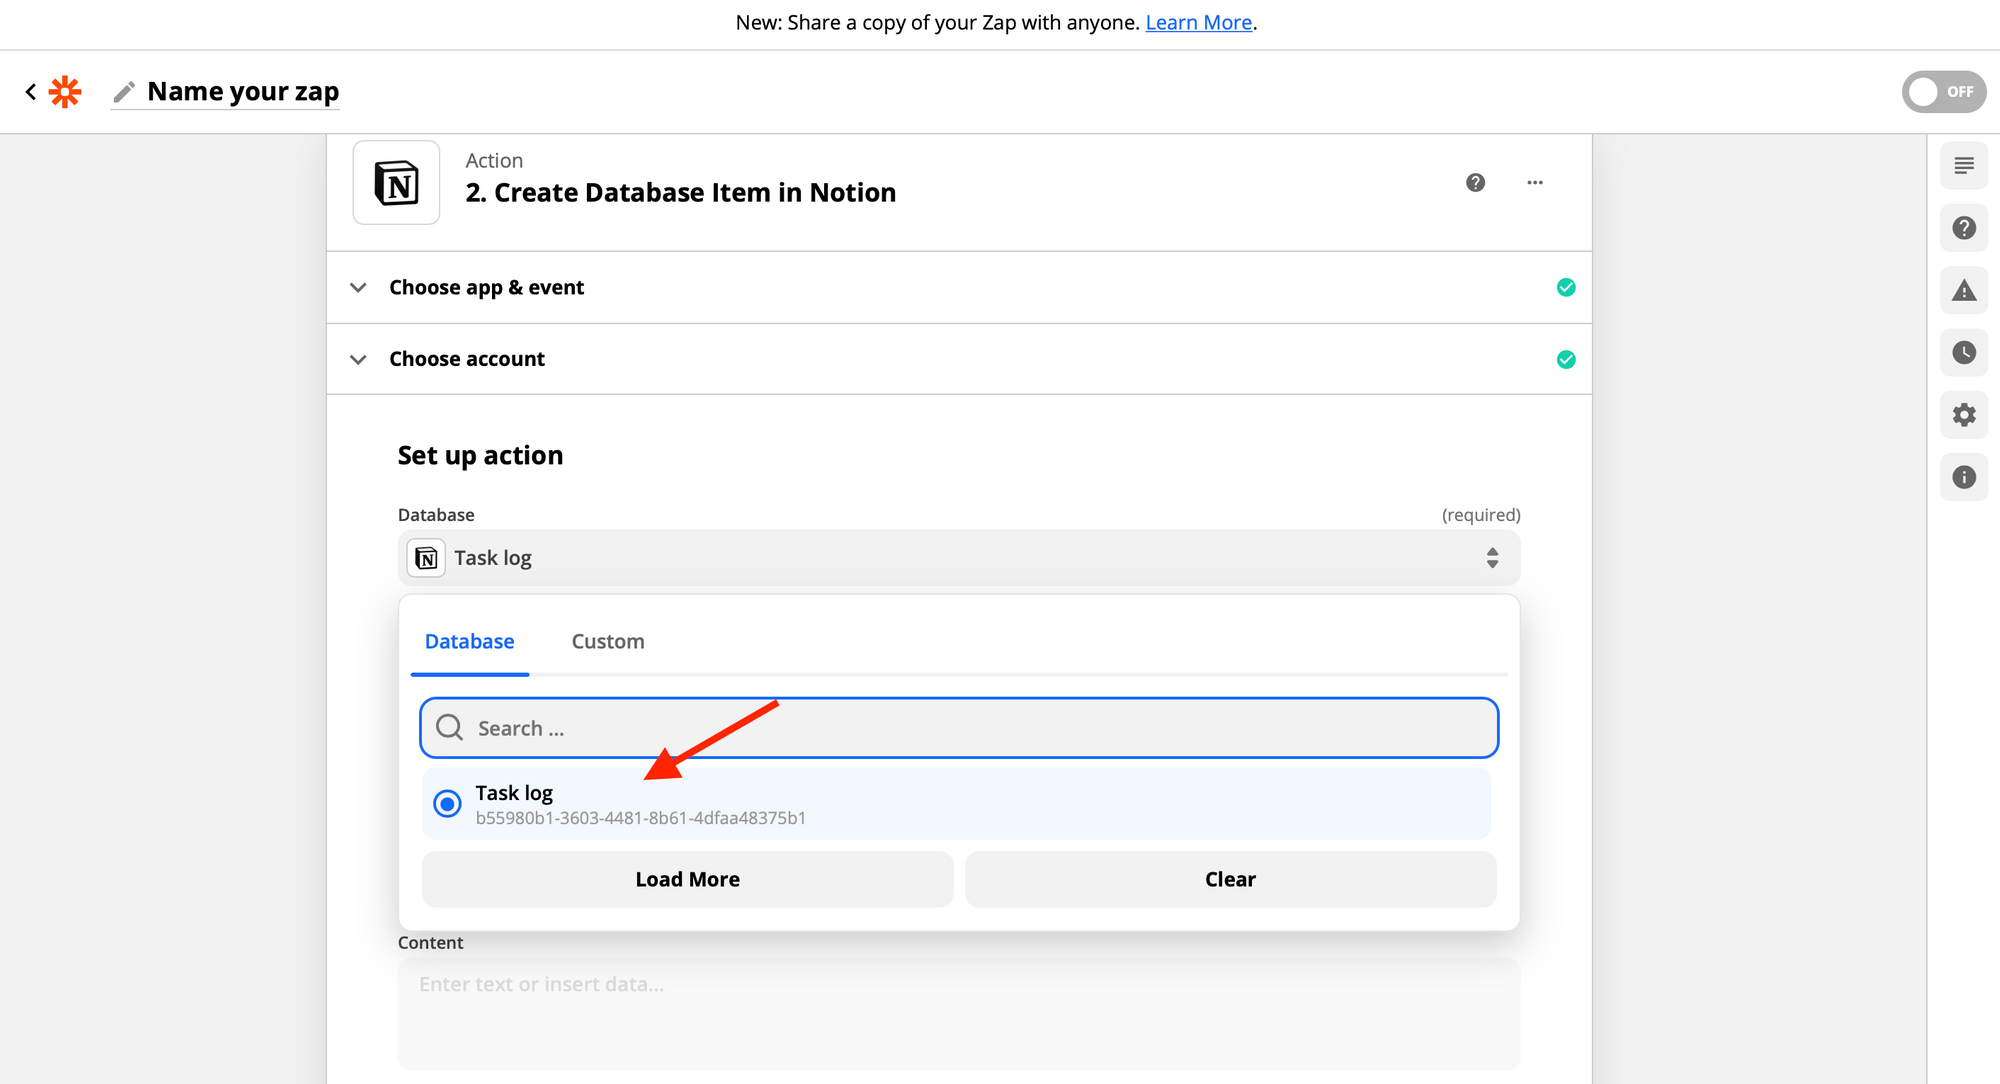
Search for Notion action in the search field, and choose it. Chose an action event — you will need the Create Database Item. Click Continue, then as your next step choose Notion account and link it. The dialog window will open and ask you for the Internal Integration Token that we created above. Paste it here and it will link your Notion to Zapier. Keep in mind, that you need to be your Notion space admin to do it.
On the next screen, you'll be asked to choose the Database where your tasks from Sympli will all go to. Chose the Name of the page that we created in Notion and shared with our integration before.
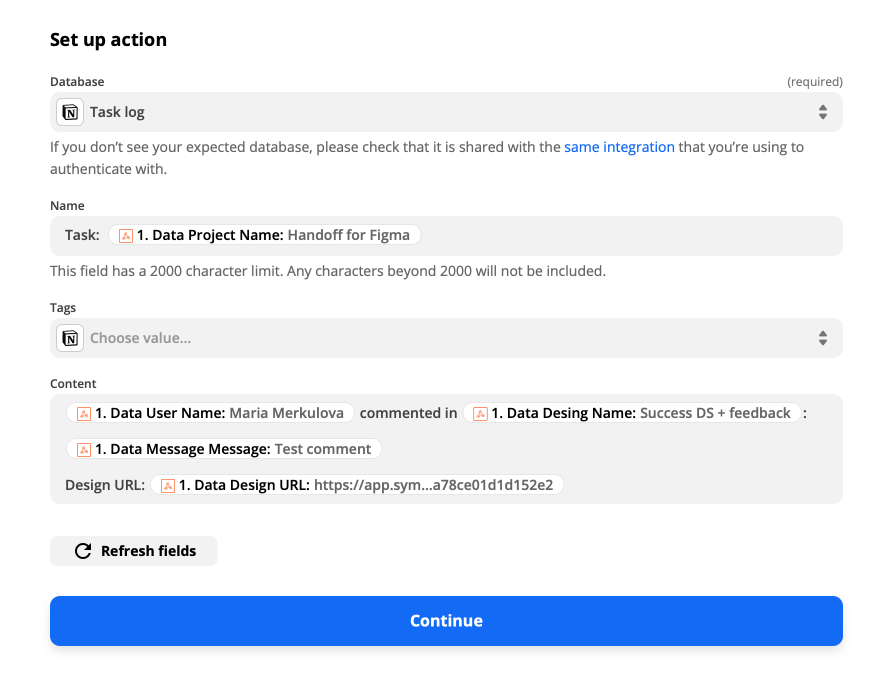
Next comes the most important step - you need to come up with what you want to see in a task and properly structure it. Zapier doesn't support Markdown or HTML here, so for a simple to-do list with a link and a comment from Sympli's annotation, we suggest the setup below. You can enter text followed by the data pulled with a webhook in the Name and Content fields.
Click Continue. Test your action — to do so, go to Sympli's project you're building the integration for and create an annotation. Then go back to Zapier and click Test & Continue.
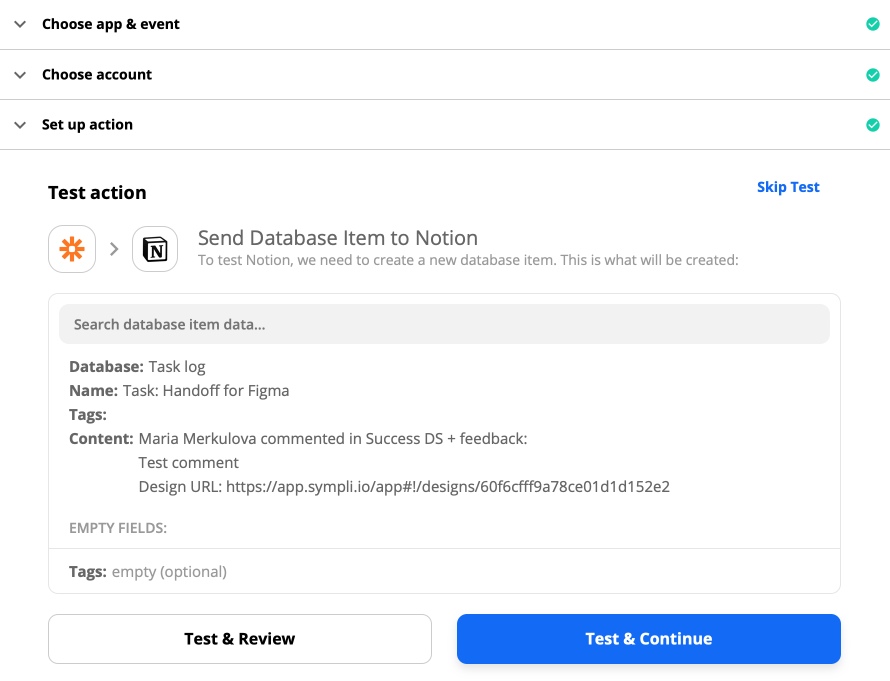
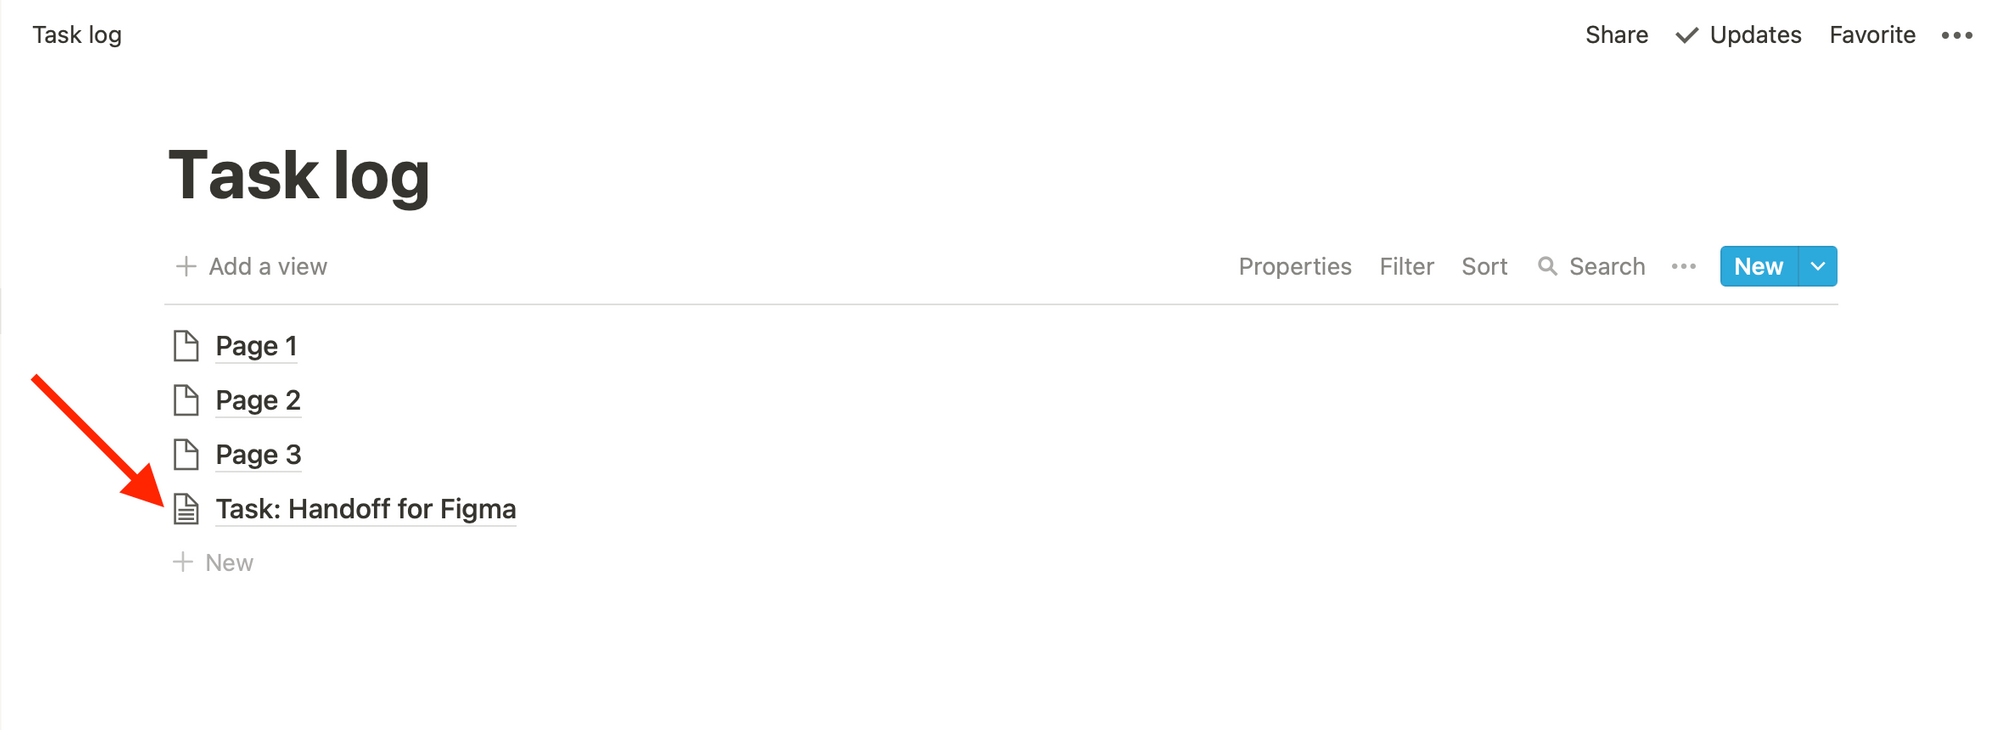
If everything is fine, you'll see the "Test was successful!" message. Go to Notion and check that the task has appeared on the Page we created for it. If it did - awesome, we're done!
Go to Zapier and click Turn on Zap to run your Custom Integration with Sympli Handoff. 🚀