
Collaborating with developers doesn’t need to be a hassle. Today we will walk-through an example Sketch workflow, demonstrating how thousands of developers and designers improve cross-team communication and drastically reduce iteration time.
Projects and resolutions in Sympli explained
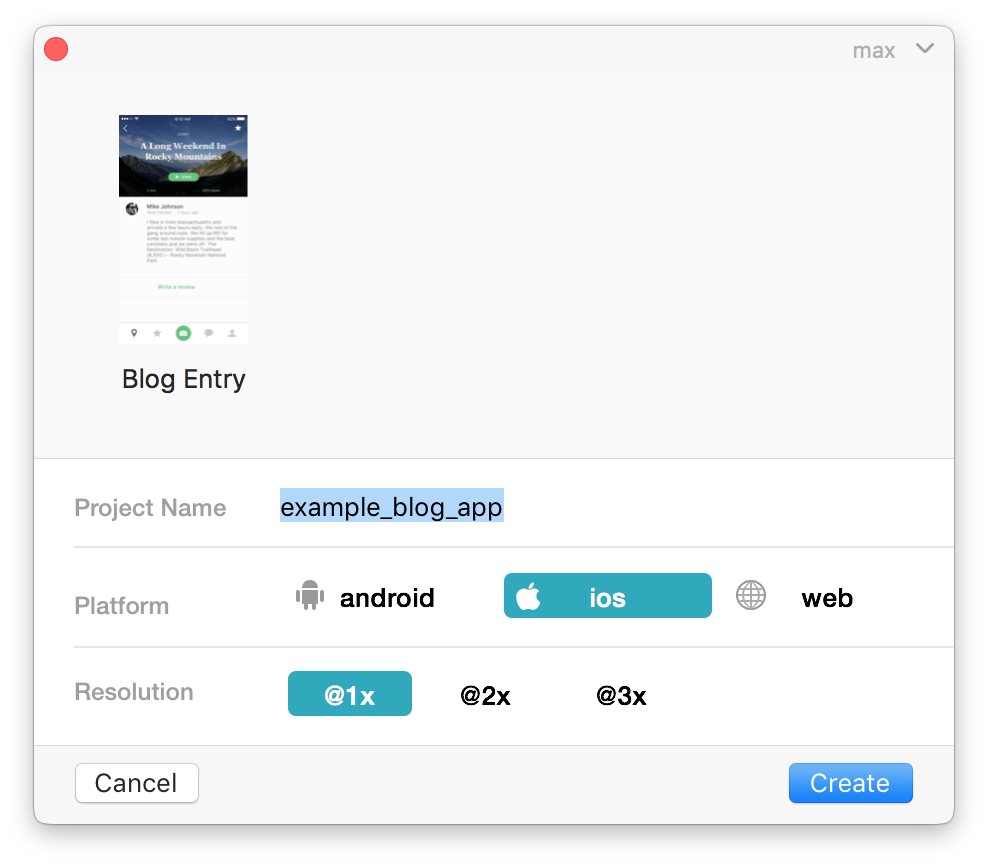
For design handoff and collaboration in Sympli, you will first need to create a project. The project stores metadata like the resolution and platform you’re exporting the design for, and can contain multiple screens.
At the moment, Sympli supports iOS, Android and Web platforms (with more coming soon), and each platform lets you select multiple resolutions.
But what does resolution mean? Let’s look at an example:
If you’re working on an iOS app for the iPhone 6, you have the following options for artboard sizes: 375x667, which stands for @1x; 750x1334, which stands for @2x; and 1125x2001, which stands for @3x resolution.
The best practice is to always design in @1x (mdpi for Android), and all of the artboard templates shipped with Sketch represent @1x resolution.
Still curious about the details? Here’s a great article by Brad Wrage on designing in @1x, and why he finds it ideal for his workflow.
Export artboards to Sympli
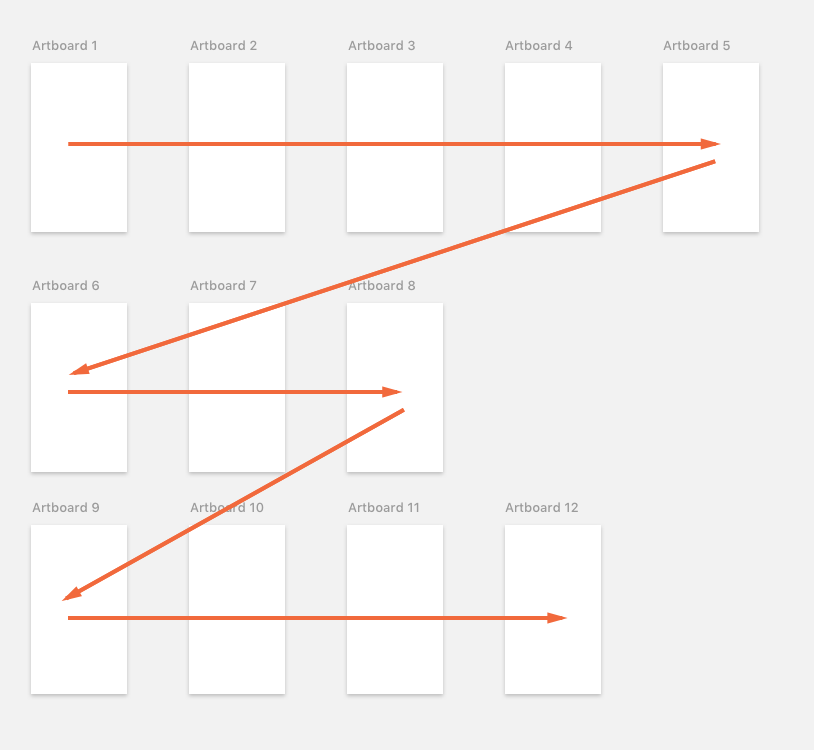
Go to Plugins → Sympli → Export or press ⌘+Y to open Sympli plugin. To export only particular artboards, select them(or their elements) in a layers tree or on canvas. Or skip selection entirely, and all of the artboards within the current page will be exported.
Select a project from the list or create a new one, and Sympli will automatically generate specs, style guides and assets.
Arrangement hint: arrange artboards in rows, and Sympli will display them sorted in so called “Natural order.”
Productivity hint: after the first export, the Sympli plugin will remember the project linked to this .sketch file, so next time you don’t have to look it up in the list, and subsequent exports can be done as quick as pressing ⌘+Y and hitting Enter.
Export assets
It’s as simple as selecting the layers or layer groups and making them and clicking “Make Exportable” in the bottom right corner. Alternatively, you can make a Slice.
A hint: If you are trying to create an asset with transparent padding, the Slice is placed into the group and “Export Group Contents Only” checkbox is checked on the Slice, so background layers and other out of the group design elements are ignored.
The major difference with the native export feature of Sketch is that you don’t have to configure all the required export formats and scales; literally any option is enough, as Sympli plugin handles scaling and exporting into different formats on it’s own.
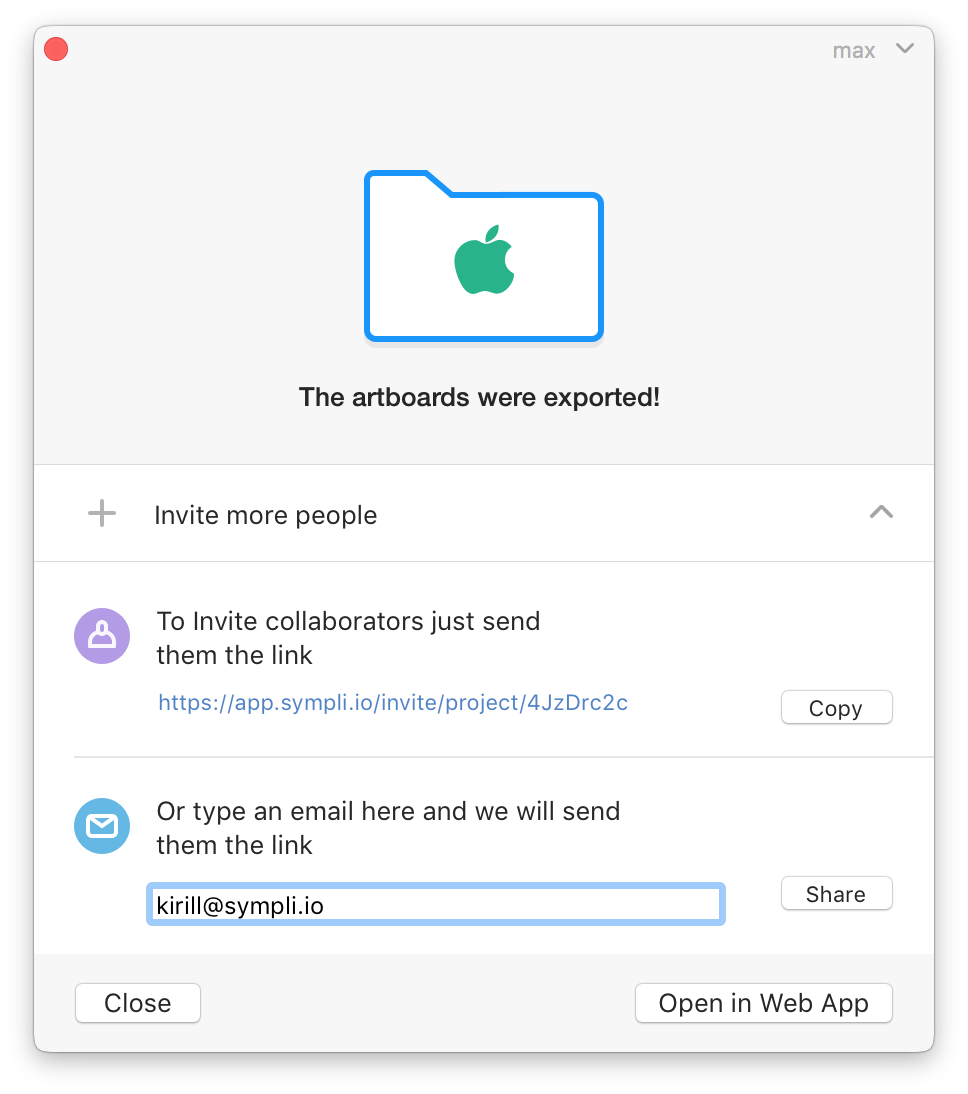
Collaborate with the team
Once the designs are uploaded, grab a shareable link or send it directly to your teammates inboxes!
In case you are updating an existing project that has already been shared, the team will be notified about the updates.
Please note that your teammates also can upload designs into the shared projects.
Next steps
Open the project in Sympli web app to inspect the designs and comment on particular areas with the annotation tool.
In Sympli web app you can also invite more collaborators, manage Brandbooks, explore layers and colors, share fonts, download assets in bitmap or vector format; even integrate with your Slack channel to keep your team updated on project activity!
Learn more about Sympli at https://sympli.io and sign up to give it a try! We would love to hear your feedback — help us build a better tool for you. You can reach out to us via email or find us on Twitter, Facebook, and LinkedIn.