

Lets say that Sketch is your primary design tool and you wanted to reuse a design component over and over again (a mobile navigation would be a terrific example of this because it would appear on most screens in the app). You would use the Symbols feature to accomplish this, which works by creating a master symbol that remains separate from the main document.
When you edit this master symbol, all instances of it in the main document (your design) follow suit, effectively keeping the component visually consistent throughout the design.
Recently, Sketch introduced a way to nest symbols (that is, the ability to have symbols inside other symbols), because the issue with consistency is that we need to show different variations of our designs depending on what screen the user is current on, and wether or not they're interacting with it.
In short, we want some symbol instances to show hover states (and other variations) while remaining otherwise visually consistent, and that's where nested symbols come into it.
Creating the Master Symbol (Navigation)
For this tutorial I'm going to use a Material Bottom Nav Bar by Riccardo, but you can totally follow along using your own .sketch design.
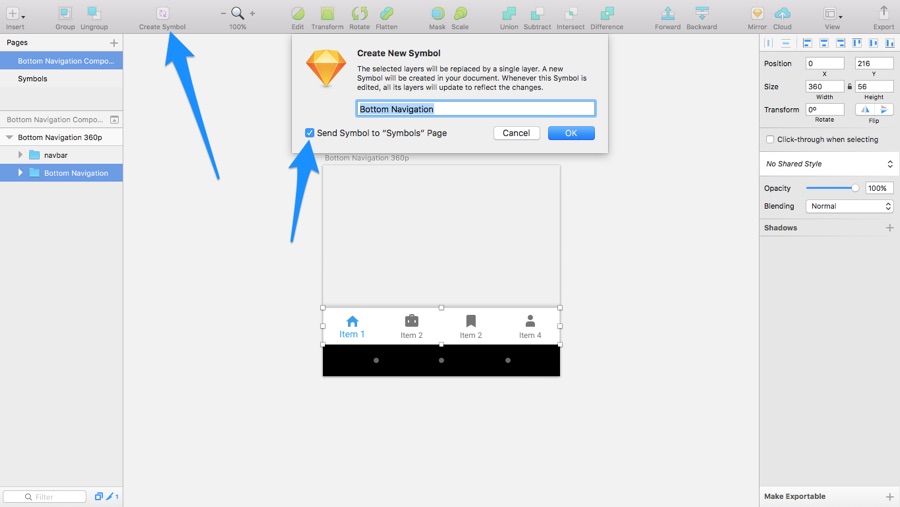
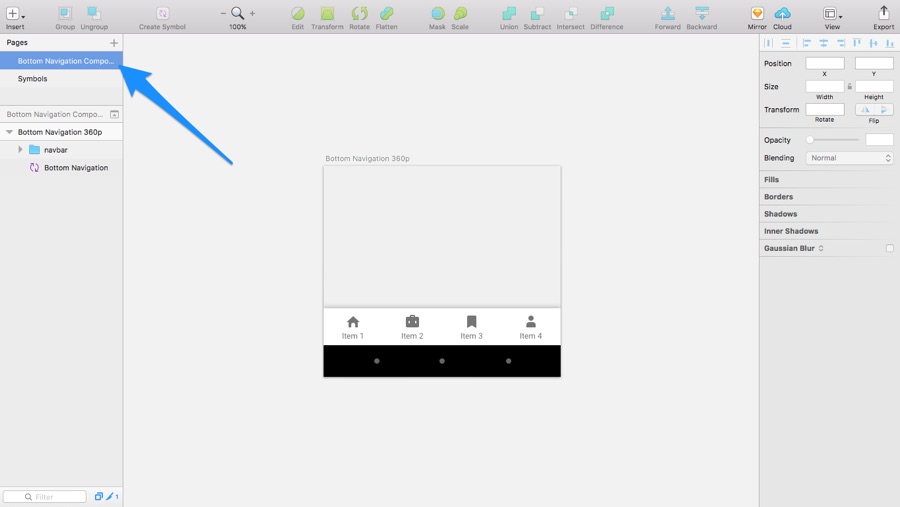
Start by opening the .sketch template, selecting the white nav bar on the canvas, and then clicking "Create Symbol" from the toolbar. Ensure that you check the box that says "Send Symbol to Symbols Page, because it's better to store the master symbol elsewhere so that our actual design doesn't become too crowded.
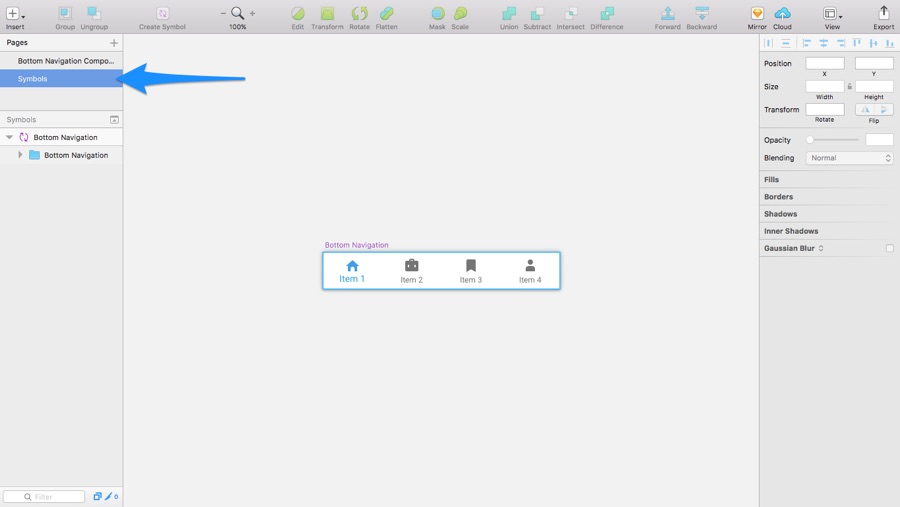
We've now isolated this component by turning it into a master symbol, and one instance of this symbol exists back on Page 1.
Creating Nested Symbols (Nav Icons)
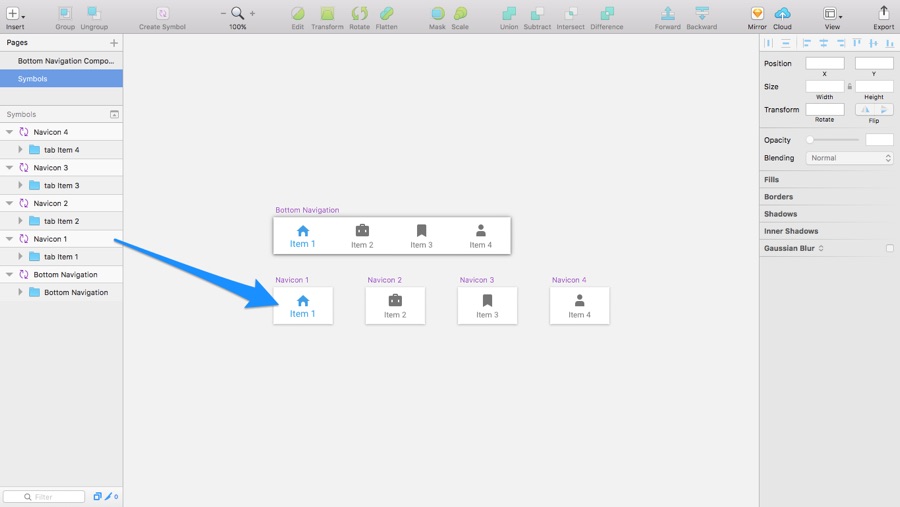
Before we start reusing this symbol we need to create the nested symbols; that is, each variation of every icon that appears in the nav bar. Repeat the steps until you have 4 nested symbols.
Rename each symbol (command + R) like so:
- Navicon 1
- Navicon 2
- Navicon 3
- Navicon 4
Designing Alternative States (Hovered/Active Nav Icons)
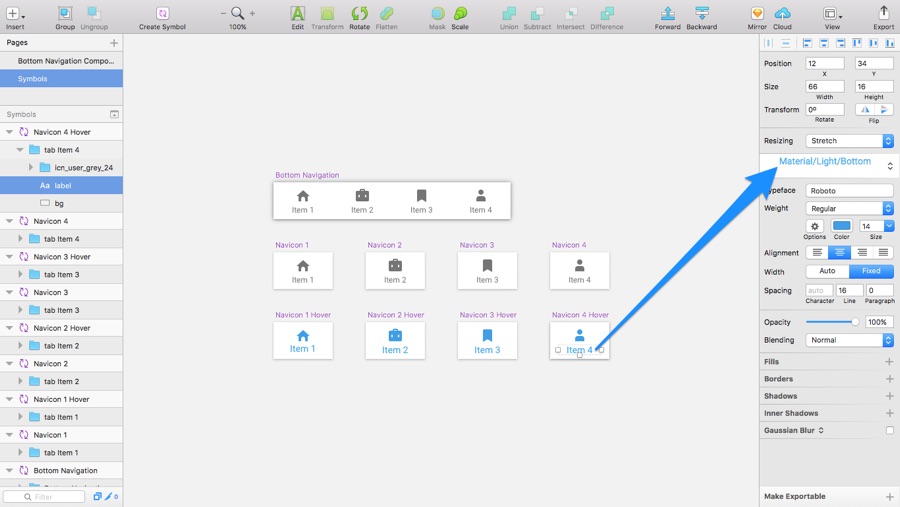
Now we need to design the hovered/active states. Duplicate (command + D) the 4 nested symbols and rename them accordingly:
- Navicon 1 (Hover)
- Navicon 2 (Hover)
- Navicon 3 (Hover)
- Navicon 4 (Hover)
If you don't rename them (as I have done above), they will remain duplicates/instances of the other symbols, as opposed to being independent symbols in their own right. Now that they're defined as separate symbols, they can be styled independently (and later on we'll be able to choose which nested symbols to use in instances of much larger symbols like the navigation).
We now need to make sure that we have 4 default states and 4 hovered/active states, which will involve a little bit of styling. However, in this .sketch template, the designer has created shared styles to help you keep these consistent (as you can see a hovered/active has already been designed). Edit the design so that it looks like this (below), using the shared styles and creating new shared styles when applicable.
Inserting Symbols with Specific States
In this next step, we're going to insert our bottom navigation symbol into the main document. Switch back to our design:
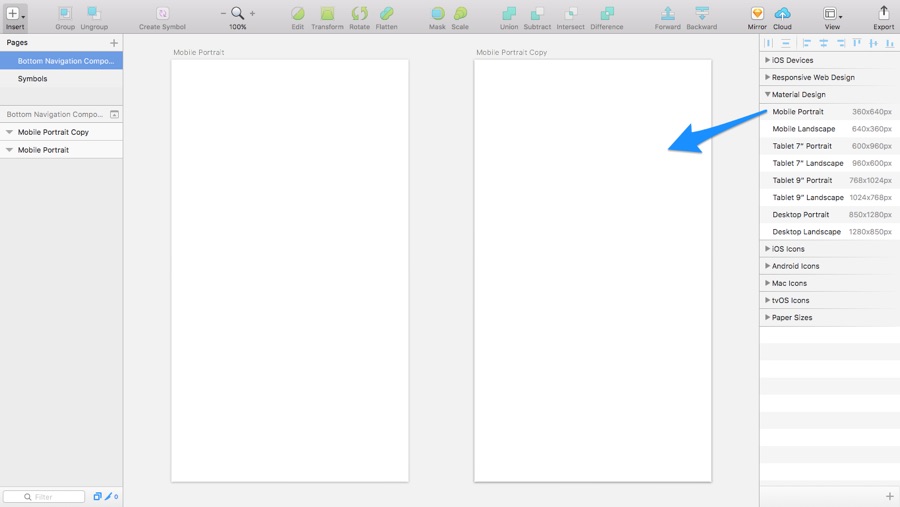
Delete everything on the canvas so that we can start again (don't worry, your symbols are safe and sound!). Press A for Artboard and choose Material Design > Mobile Portrait from the inspector on the right-hand side, and then repeat this step so that there are two empty artboards on the canvas.
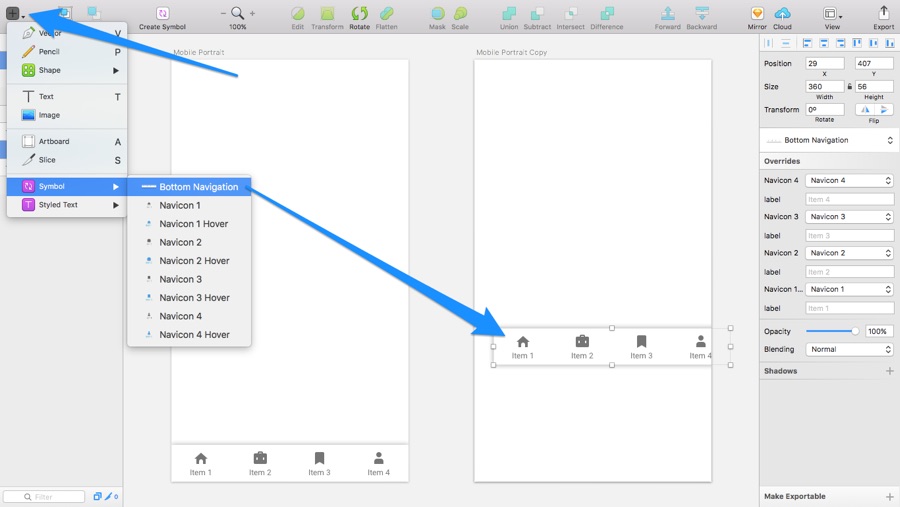
Navigate to Insert > Symbols from the toolbar and select the navbar symbol - drag it to the very bottom of the artboard and then repeat this step so that each artboard contains one instance of the symbol. If you edit the styles in one instance of the symbol, the other instance will automatically reflect it.
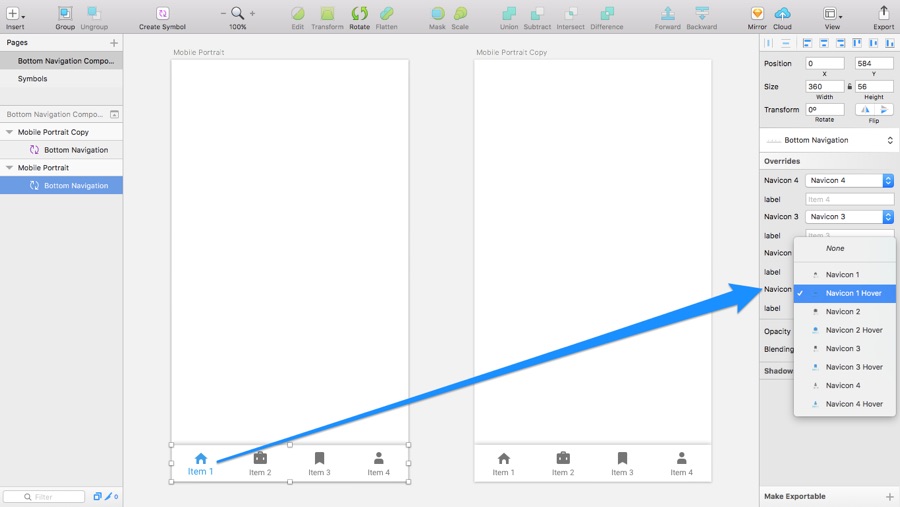
But of course both screens/artboards need to show one active state each. In order to demonstrate this kind of flexibility we need to use the inspector to alternate the nested symbols.
Start by swapping Navicon 1 for Navicon 1 Hover.
Note: in order for nested symbols to work, each swappable instance must be the same width and height.
Tip: you can organise artboards to specify their ordering when handed off to Sympli.
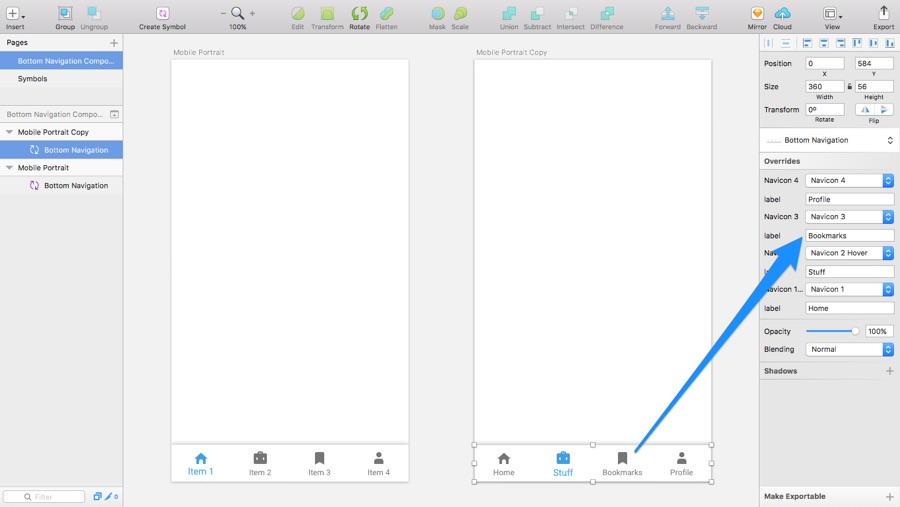
Overriding Content with Symbol Overrides
Is this the only kind of flexibility that symbols offer? Nope, not even. Sometimes you'd need each instance to display different text, which you can also define using the inspector.
Conclusion
Ever since Sketch 37, designers have been wondering if the "new symbols" was the right way forward for Sketch. Before Sketch 37, symbols could be edited in-context (edited directly where they appeared in the design), which I have to admit I still miss. That being said, I am nonetheless quite happy with symbols because they weren't very flexible before. Symbols were either 100% consistent or you didn't use them (which many of us didn't). Nested symbols changes the game, don't you think?
Have integrated nested symbols into your workflow yet? If so, have they increased productivity? If not, why haven't you?
Send us a tweet and let us know!